
How to convert Your Chinese lights to use
My Chinese light adapters lets you adapt your Chinese lights to use Marwi Helmet and Handlebar mounts |
||
|
I make adapters for the 3 different body styles shown below Match up your body style and select the adapter made for that type of body |
||
 |
 |
 |
|
MS900 style bodies |
MS1600 style bodies |
BT21 style bodies |
| - | ||
 You also need the Marwi mount kit in order to bolt the adapters to the Marwi slide mounts The kit is a nylon bolt, two nylon nuts and two lock washers See the links at the top of this page to my Web store where these parts can be purchased |
||
| - | ||
|
This section is for the MS900 body style lights |
|
| Click on the images for a larger image | |
|

|
|
The original Magic Shine MS900 light body looks like this |
Here is a newer style MS light body. Notice the reduced size at the back of the light. My MS900 adapter works on this this body style also |
| - | |
 |
 |
|
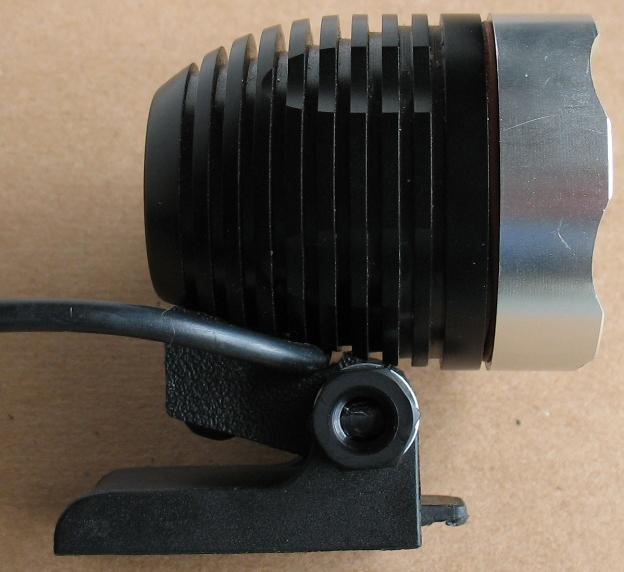
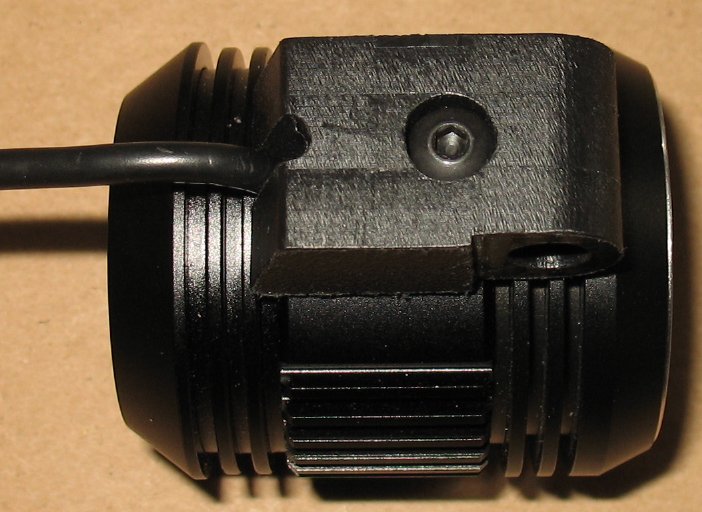
First remove the original mount from the bottom of your light There is a small screw that you remove and the mount comes right off There may be a small rubber grommet under the mount You can snip this grommet off the power cord, it is not needed. |
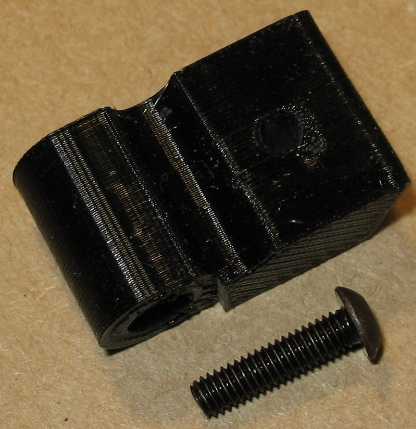
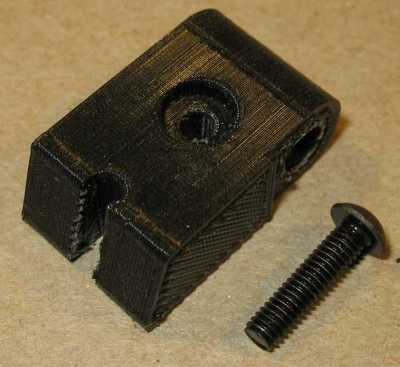
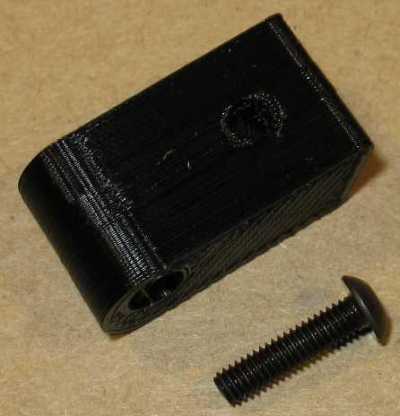
MS900 adapter You will be replacing the stock mount with these parts |
| - | |
| Click on the images for a larger image | |
|
|
|
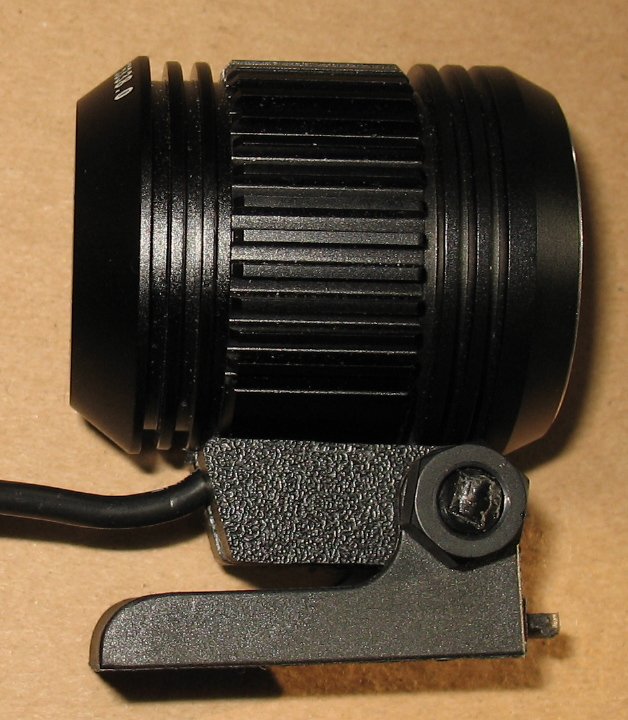
Bend the power cord to the right or left side, your choice. Push the adapter up against the MS light body. The wire lays in the half round channel in the adapter Thread the screw into the body with a metric Allen wrench |
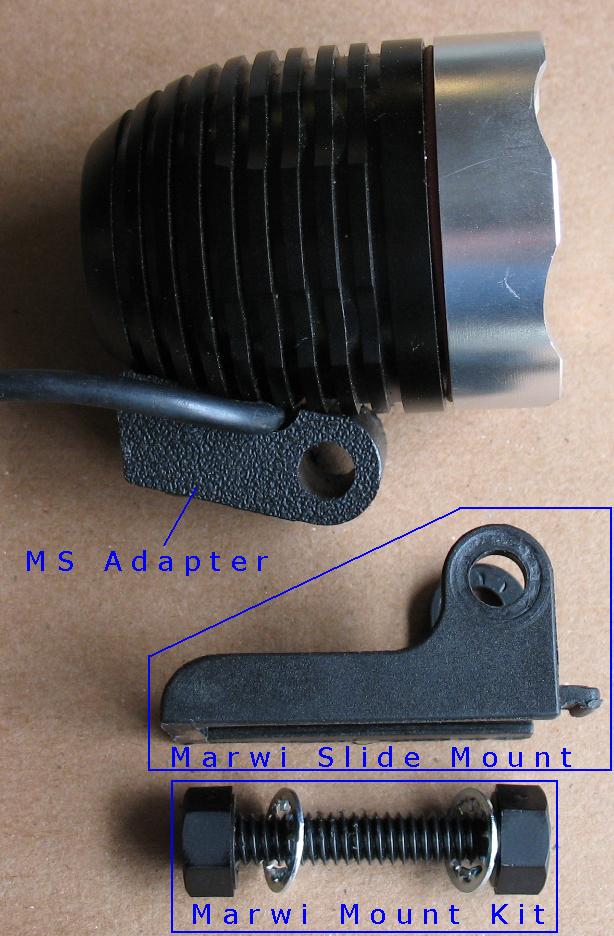
See the image on the left The Marwi slide mount comes with the Marwi Helmet or Handlebar mount. So you will have to order a Helmet or Handlebar mount You will also have to order The Marwi Mount kit The Marwi mount kit is a Nylon bolt, 2 nylon nuts and 2 lock washers. |
| - | |
| - |
 |
|
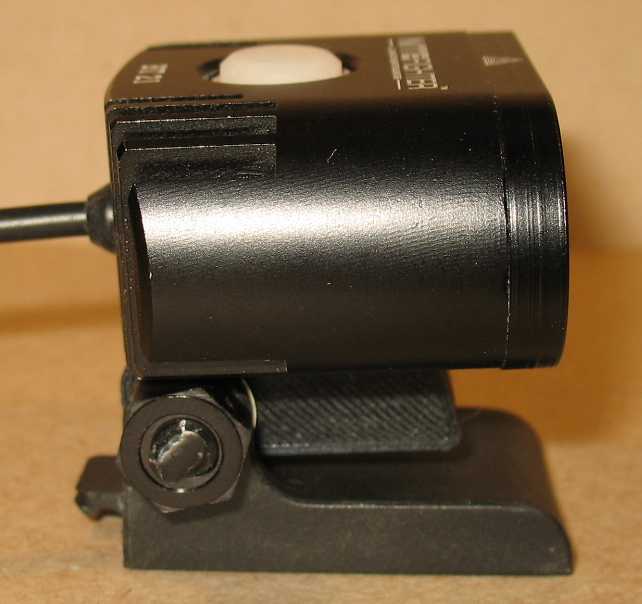
It may be hard to see in the images but the light bodies are machined flat where the adapter bolts on Hold the Marwi slide mount up to the MS adapter so the big holes line up Slide in the threaded Nylon bolt on the side that has the washer recess area Slide a lock washer into the recessed area and push the bolt all the way through to the other side. You may have to tap the bolt with a hammer to get it to slide through the holes Put one lock washer on the inside and one on the outside of the slide mount Screw on the two nylon nuts |
Starting on the left, the parts go together like this for the MS900 adapter Nut - Washer - Slide Mount - MS Adapter - Washer - Slide Mount - Nut Now you can slide your MS light onto your Marwi Helmet or Handlebar mounts |
| - | |


|
The section is for the BT21 type lights |
|
 |
|
|
This is the NiteFighter BT21 body |
|
| - | |
 |
 |
|
First remove the original mount from the bottom of your light There is a small screw that you remove and the mount comes right off |
You will be replacing the stock mount with these parts |
| - | |
| Click on the images for a larger image | |
 |
 |
|
I found it is easier to assemble the slide mount without attaching the adapter to the light body The two washers go on the inside of the slide mount |
If the Marwi mount kit bolt does not slide in easily, tap it lightly with a hammer. A wood block with a hole works great for this. |
| - | |
| Click on the images for a larger image | |
 |
 |
|
It looks like this once the bolt is in place The two washers go on the inside of the slide mount |
Now thread on the nuts Don't tighten the nuts down yet. |
| - | |
| Click on the images for a larger image | |
 |
|
|
Swivel the adapter so you can get access to the screw head with a wrench Thread the screw into the body with a metric Allen wrench Tighten down the screw, but do not over tighten it. |
Swivel the light down and then tighten the two nylon nuts Now you are ready to slide the light onto a Marwi Helmet or handlebar mount |
| Click on the images for a larger image | |
 |
 |
|
Marwi handlebar mount |
Marwi handlebar mount |
| - | |
| Click on the images for a larger image | |
 |
 |
|
Marwi helmet mount |
Marwi helmet mount |
| - | |
Enter My Tube Amp Parts Store Here
Mobile users Enter My Tube Amp Parts Store Here
The Tube amp Library of information
Click the link above for Tube amp info, Schematics, Board building information, Projects, Mods, Transformer diagrams, Photo's, Sound clips.
There are hundreds of pages of Tube amp information on my library page.
Please visit my Tube Amplifier Forum
Here's the place you can go to ask tube amplifier questions.
You will find a large community of friendly amp builders at the link above.
Check the huge library of Schematics here
Design your own custom Turret Board or Eyelet board
DIY Layout Creator file analyzer program
DIY Layout Creator file library
Sound clips and tunes of all types
How to email me
|
MEMBER OF PROJECT HONEY POT Spam Harvester Protection Network provided by Unspam |