
The Magic Shine LED bike light |
|
| Click on the images for a larger image | |
 |
|
|
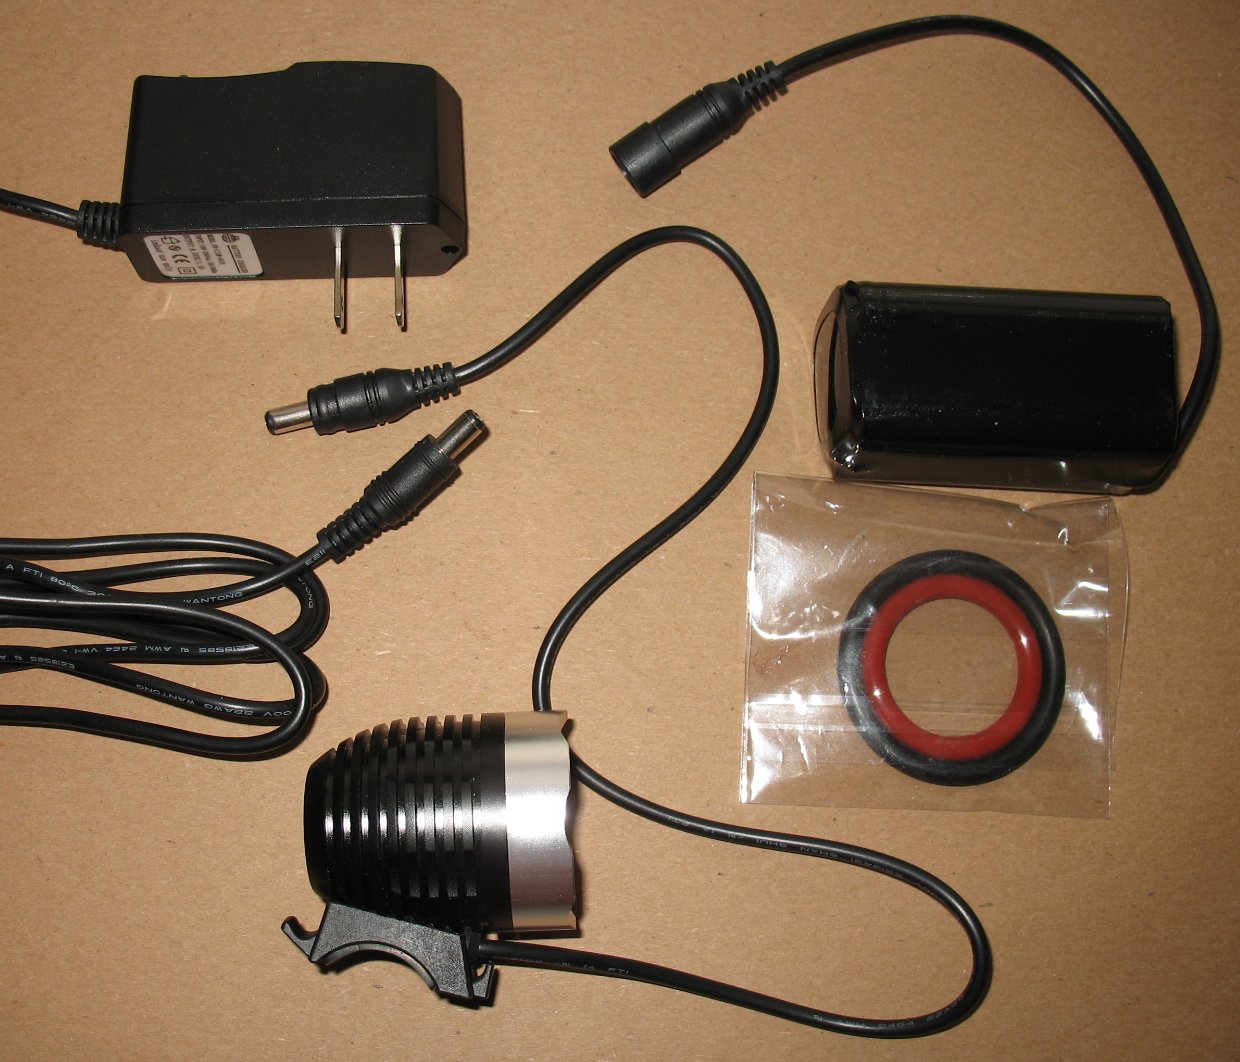
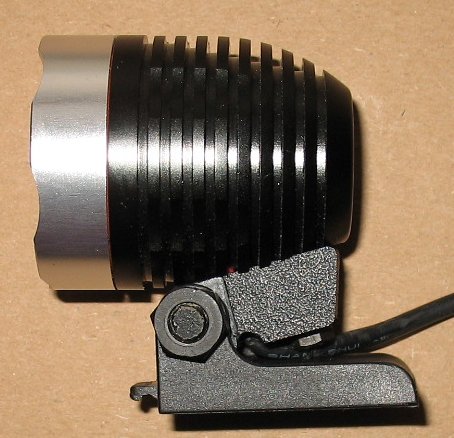
This is the SSC P7 bike light offered by Magic Shine as sold by DX. It also comes with a little Velcro pouch for the battery pack - not shown in the photo above |
|
| - | |
| Click on the images for a larger image | |
 |
 |
|
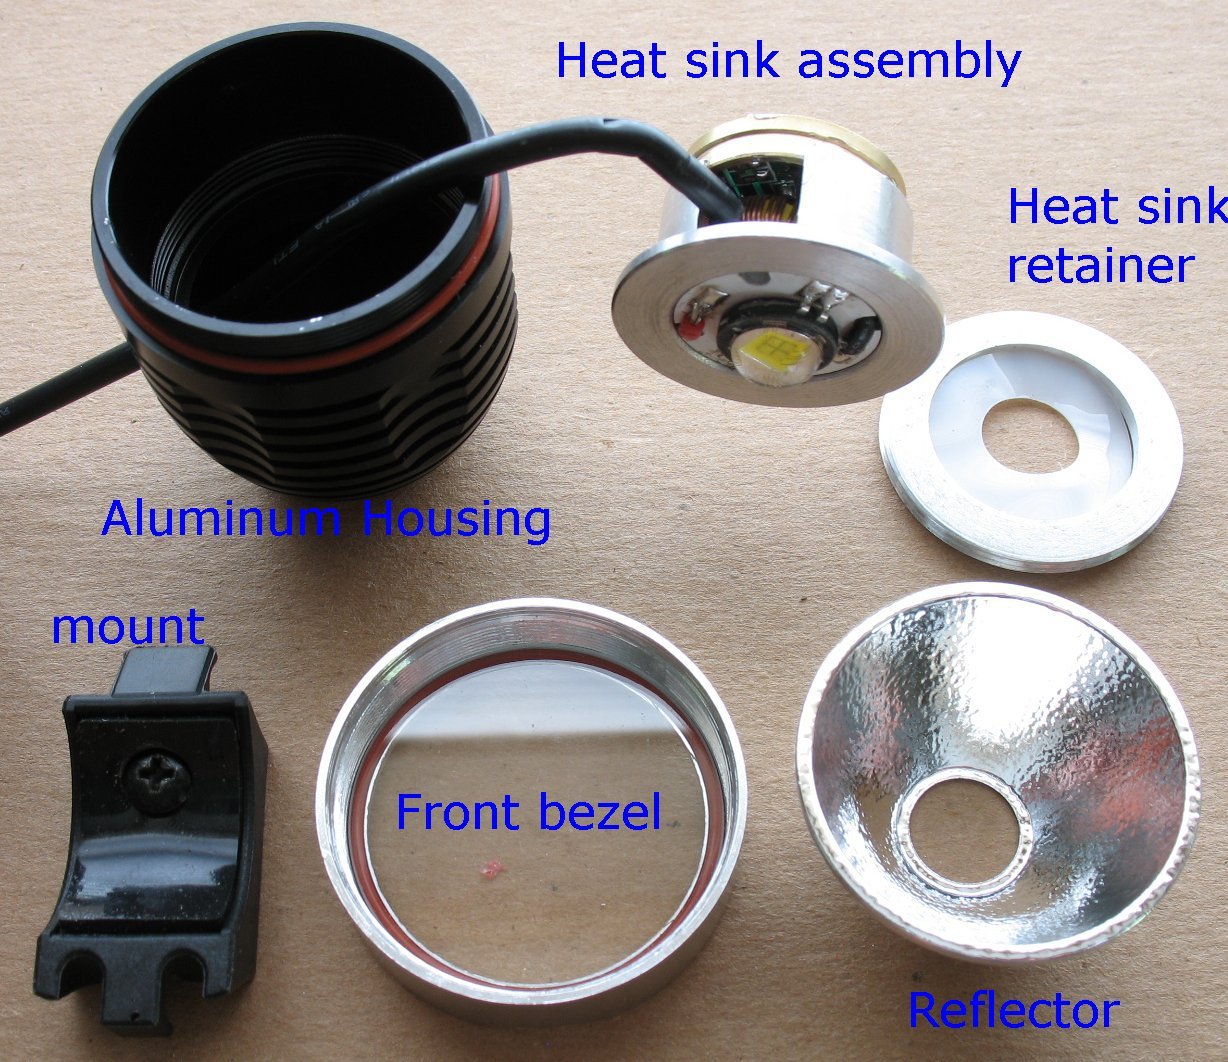
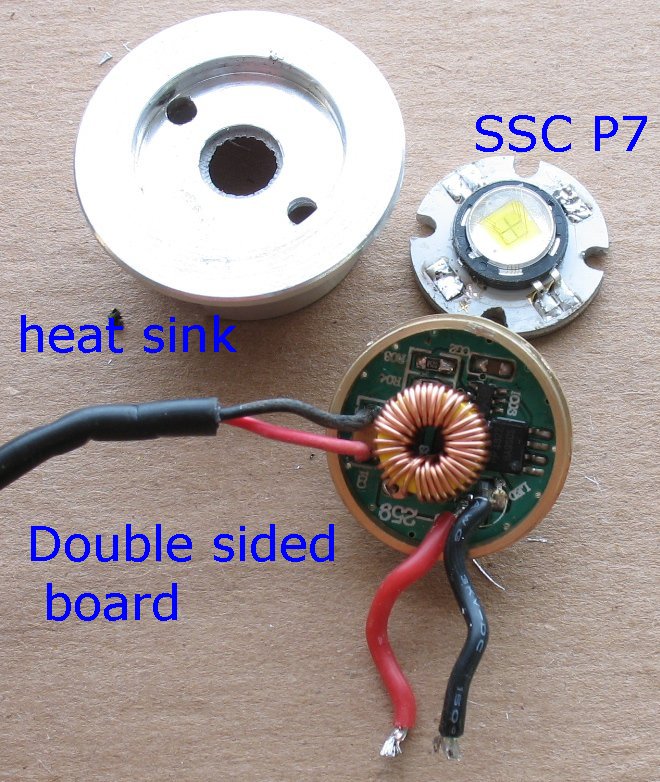
Disassembly: The mounting foot comes off with one screw. Unscrew the front bezel and glass Pull out the reflector Unscrew the heat sink retainer ring Pull out the heat sink assembly Gently pry the brass rear section away from the heat sink. It is a press fit. Note that there is also a white plastic insulator piece that is shown inside the heat sink retainer above. |
|
| - | |
| Click on the images for a larger image | |
 |
 |
|
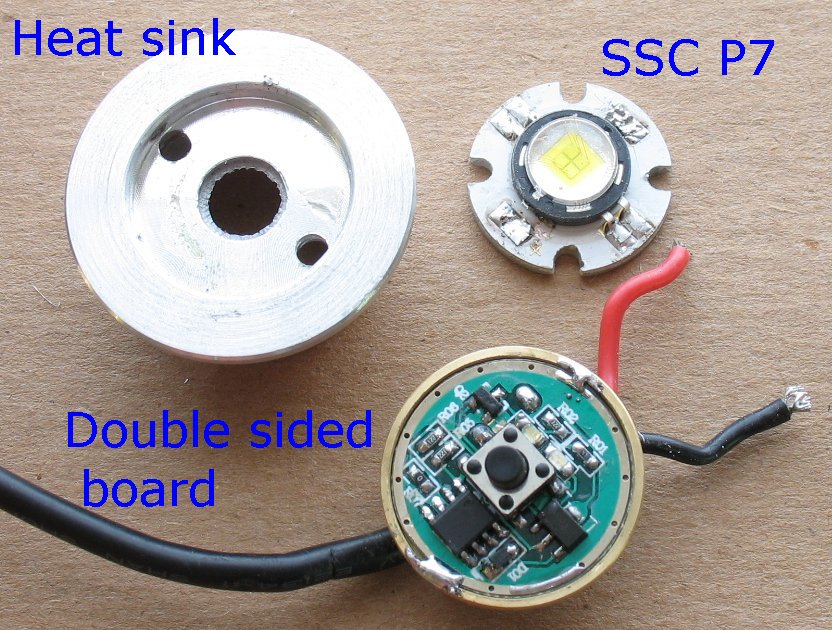
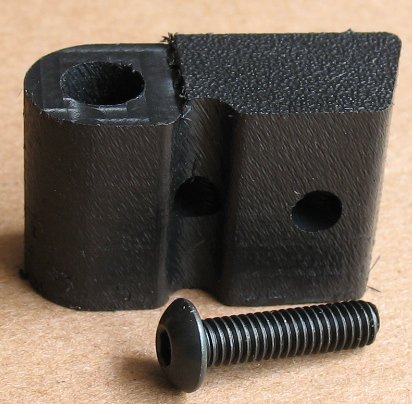
Notes: Good thing I took it apart. The SSC P7 is not screwed down and there was no heat sink grease under it. There are aluminum shavings inside the electronics area that are big enough to short out something. The red wire going to the SSC P7 just fell off the board. It was not soldered properly. Problem: The screw that holds on the mounting foot is only long enough to enter the body by two threads. Needs a longer screw. |
|
| - | |
| Click on the images for a larger image | |
 |
 - - |
|
There is a green LED on the circuit board that is always on when the battery is plugged in. I imagine that the Red LED comes on when the battery voltage drops below a certain point. I measured 8.5 volts DC on a fully charged battery pack. |
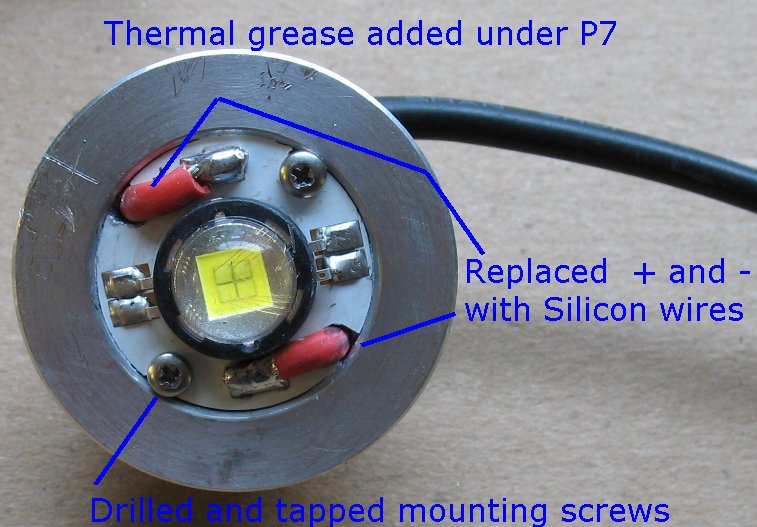
Some of the items I changed. I drilled and tapped two 1-72 mounting screws. I added thermal grease under the P7 I replaced the stiff LED + and - wires with super soft silicon wires. |
| - | |
| Click on the images for a larger image | |
 |
 |
|
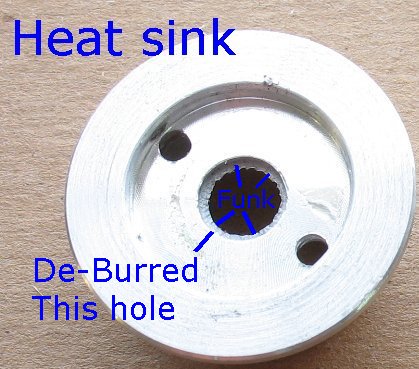
The aluminum heat sink had a huge amount of aluminum pieces hanging off it on the back side. There were loose thread like pieces inside the area where the circuit board is. The hole in the center of the heat sink had a thin tin foil section surrounding the hole. I had to de-burr the hole, removing all that extra aluminum funk. |
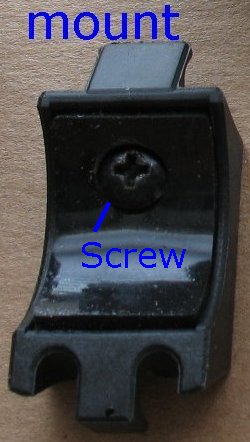
The screw that holds the mount to the body was too short. There are only two threads holding the mount to the body. |
| - | |
 I am not big fan of O-Ring mounts and so I am now selling adapters that let you mount the Magic Shine light to a Marwi helmet or handlebar light Go back to the main bike light page for more info on the Marwi mounts |
|
| - | |
|
UPDATE: My Magic Shine light died on my work bench after a short while of working. I believe I shorted out the wires going to the LED and fried something on the driver board. I converted this light to use my standard dual 1400ma board driver I converted the battery pack from 7.2 volts to 3.6 volts |
|
| - | |
Enter My Tube Amp Parts Store Here
Mobile users Enter My Tube Amp Parts Store Here
The Tube amp Library of information
Click the link above for Tube amp info, Schematics, Board building information, Projects, Mods, Transformer diagrams, Photo's, Sound clips.
There are hundreds of pages of Tube amp information on my library page.
Please visit my Tube Amplifier Forum
Here's the place you can go to ask tube amplifier questions.
You will find a large community of friendly amp builders at the link above.
Check the huge library of Schematics here
Design your own custom Turret Board or Eyelet board
DIY Layout Creator file analyzer program
DIY Layout Creator file library
Sound clips and tunes of all types
How to email me
|
MEMBER OF PROJECT HONEY POT Spam Harvester Protection Network provided by Unspam |