
18650 Battery holder |
|
|
This page explains the difference between wiring batteries in Parallel, Series or Series/Parallel. Battery wiring page link Go to the page above to see diagrams on the different ways to wire up batteries. |
|
| - | |
| Click on the images for a larger image | |
 |
 |
|
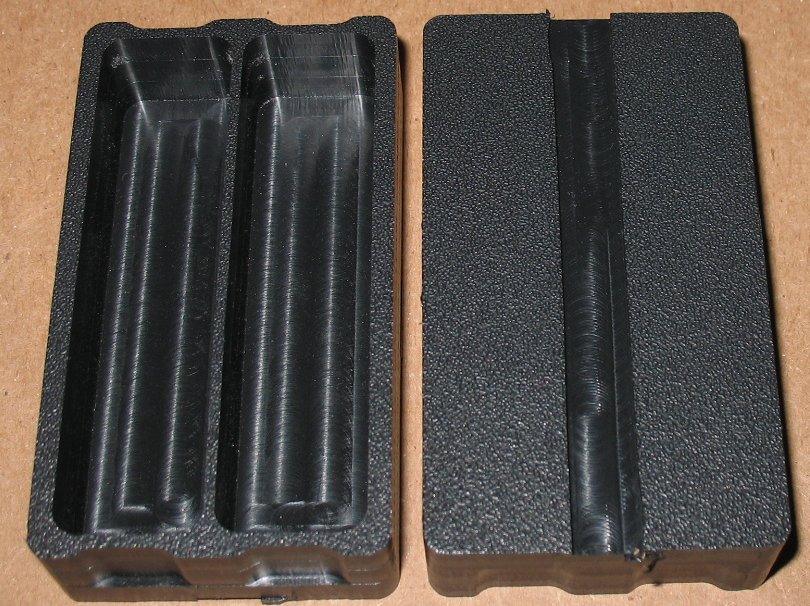
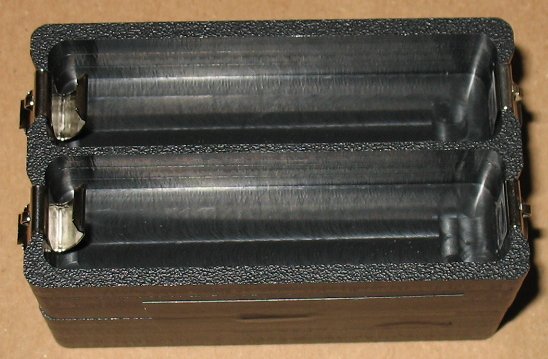
Here's a shot of both half's of the 4 x 18650 Battery Holder. The groove running down the back side is the wire channel. |
Start by tapping both half's together with vinyl electrical tape |
| - | |
| Click on the images for a larger image | |
 |
 |
|
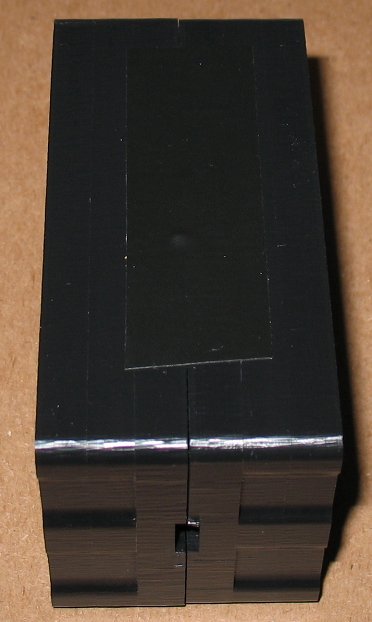
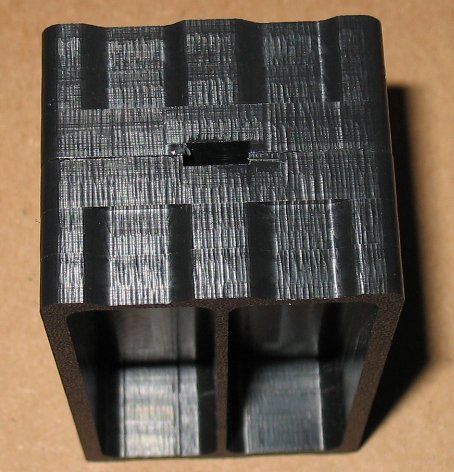
Here you can see the groove for the power wire Both half's are tapped together |
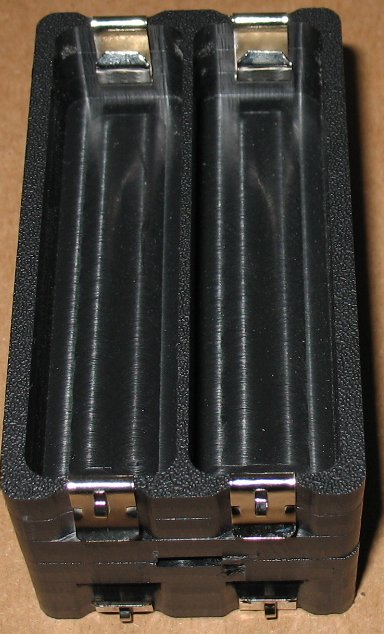
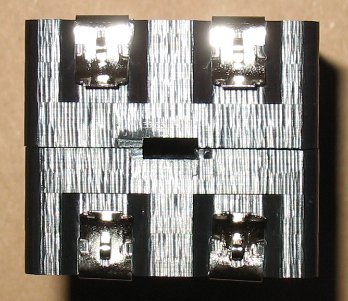
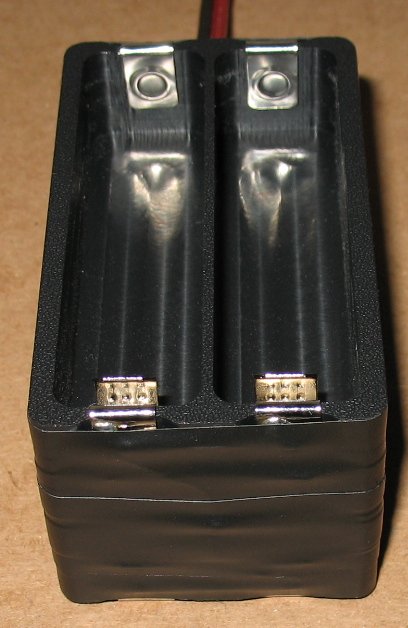
Press the battery terminals onto the battery holder ends. This battery holder is a 3.6 volt parallel battery holder. All four + terminals are on one end All four - terminals are on the other end |
| - | |
| Click on the images for a larger image | |
 |
 |
| Here's a end shot with the battery terminals pressed into place | Here's a side shot with the battery terminals pressed into place |
| - | |
| Click on the images for a larger image | |
 |
 |
|
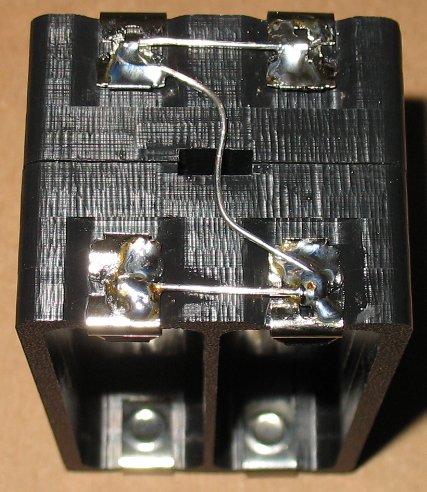
Wind some wire through the terminals to connect them all together Solder the wire to the terminals. Warning: Solder very quickly and get the soldering iron away from the terminals. You will melt the HDPE plastic if you take too long to solder the joint. I use a 40 watt soldering iron for this because it can solder very quickly |
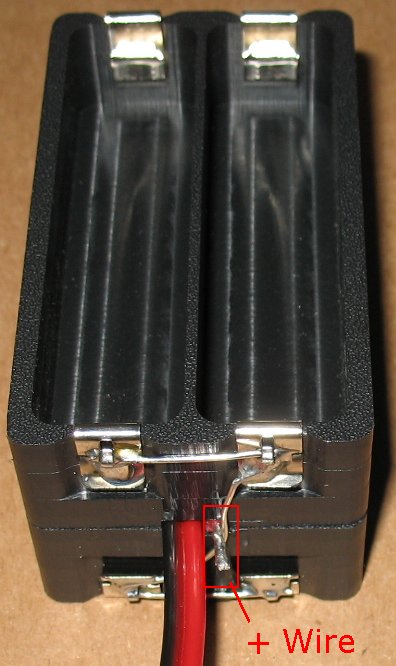
Here I have split my wire so the red positive wire doubles back onto itself. You can slide on some heat shrink tubing now if you want to use it. I am using the Red/Black zip cord shown above for my power wire. You can use what ever type connector you like to use. Just make sure you wire the + and - wires correctly |
| - | |
| Click on the images for a larger image | |
 |
 |
|
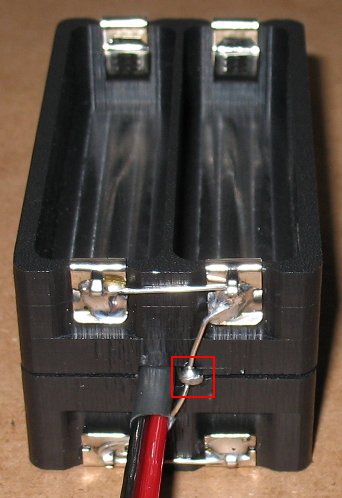
Shove your power wire into the wire hole. The tip of the + wire can be seen sticking out of the wire hole. The tip of the - wire also sticks out the hole on the other end See the picture on how I split wire |
Shove your power wire into the wire hole. The tip of the - wire can be seen sticking out of the wire hole The tip of the + wire also sticks out of the wire hole on the other end. See the picture on how I split wire |
| - | |
| Click on the images for a larger image | |
 |
 |
|
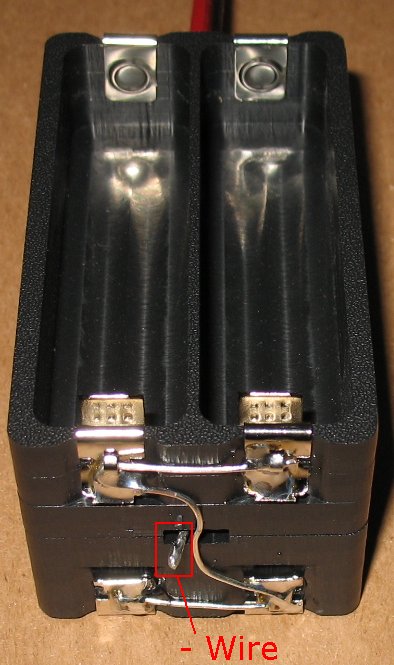
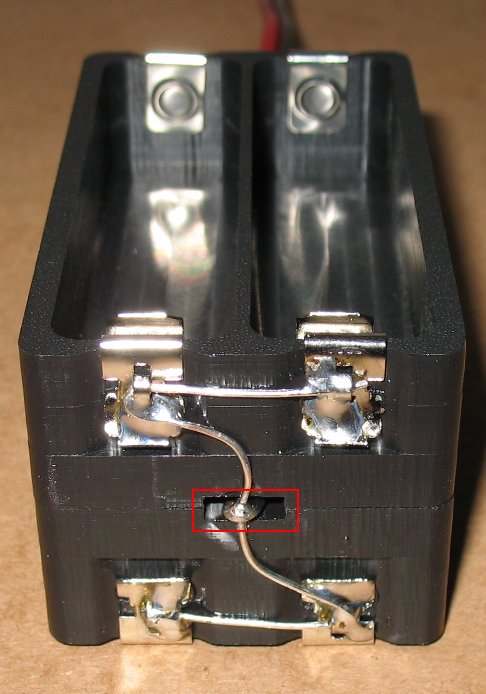
Make a hook shape on the + and - wires and solder them to battery terminal wires. Pushing and pulling the main wire will help you position the + and - wires |
Make a hook shape on the + and - wires and solder them to battery terminal wires Pushing and pulling the main wire will help you position the + and - wires |
| - | |
| Click on the images for a larger image | |
 |
 |
|
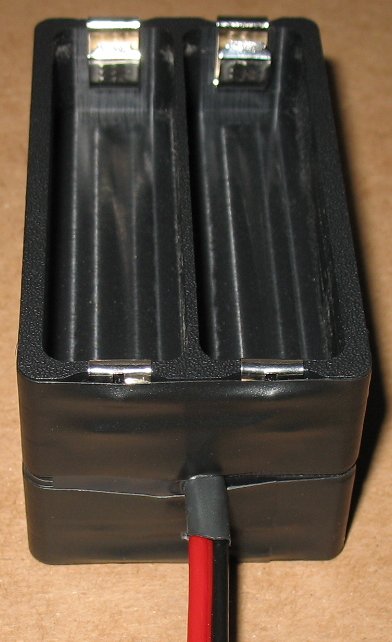
Wrap vinyl electrical tape around the battery body to cover up the bare wires This also holds the battery holder half's together as one. See the Velcro strap tip below |
Wrap vinyl electrical tape around the battery body to cover up the bare wires This also holds the battery holder half's together as one See the Velcro strap tip below |
| - | |
| Click on the images for a larger image | |
 |
 |
| Here's a shot showing what the battery holder looks like with 4 x 18650 batteries inside |
Here's a nifty little trick I just figured out the other day. Take a Velcro strap and tape it down as you are wrapping the battery holder body with tape. I picked up a roll of these 15" long Velcro straps at Lowes. They come in handy for lots of things |
| - | |
Enter My Tube Amp Parts Store Here
Mobile users Enter My Tube Amp Parts Store Here
The Tube amp Library of information
Click the link above for Tube amp info, Schematics, Board building information, Projects, Mods, Transformer diagrams, Photo's, Sound clips.
There are hundreds of pages of Tube amp information on my library page.
Please visit my Tube Amplifier Forum
Here's the place you can go to ask tube amplifier questions.
You will find a large community of friendly amp builders at the link above.
Check the huge library of Schematics here
Design your own custom Turret Board or Eyelet board
DIY Layout Creator file analyzer program
DIY Layout Creator file library
Sound clips and tunes of all types
How to email me
|
MEMBER OF PROJECT HONEY POT Spam Harvester Protection Network provided by Unspam |