
18650 Battery holder experiment |
|
|
I have been fooling around with HDPE, High-density polyethylene, cutting out some 18650 Battery holders. |
|
| - | |
| Click on the images for a larger image | |
 |
|
| - | |
|
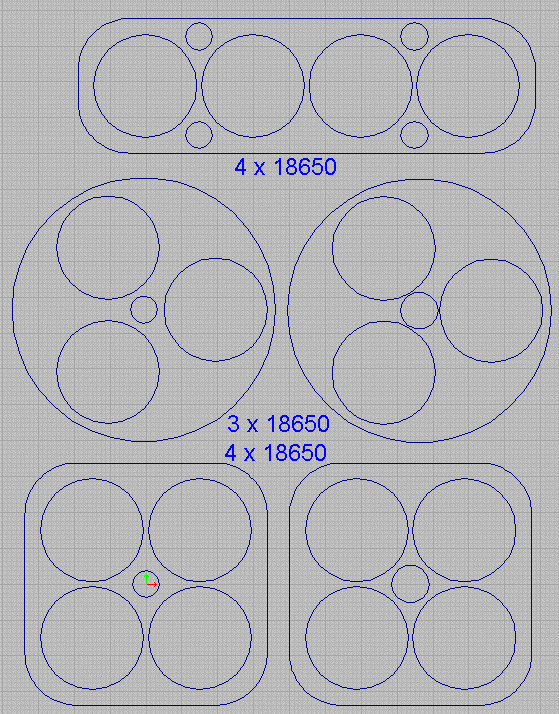
Some of the possible shapes that I can cut. 2, 3 and 4 18650 battery shapes can be cut. I suppose even more than 4 x 18650 shapes could be cut also. |
|
| - | |
| Click on the images for a larger image | |
 |
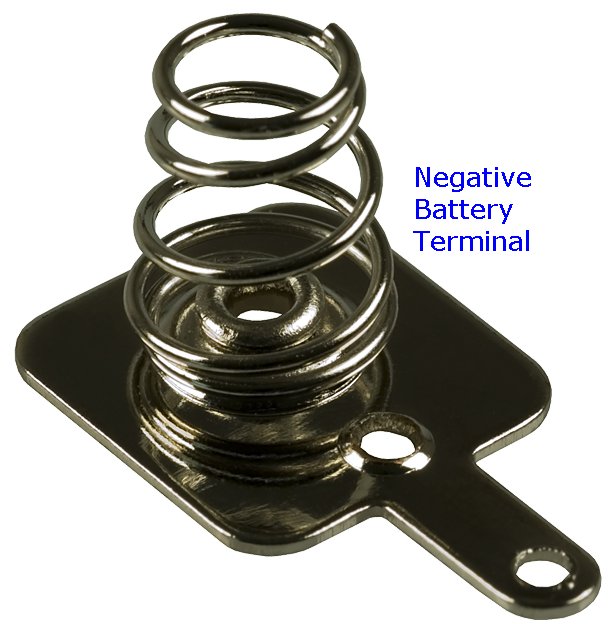 |
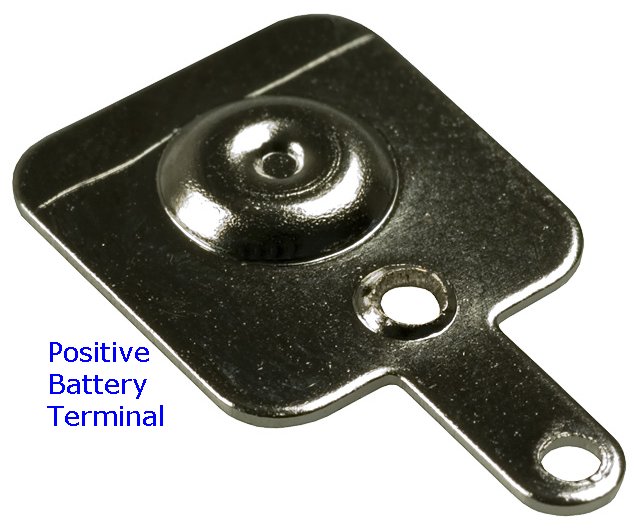
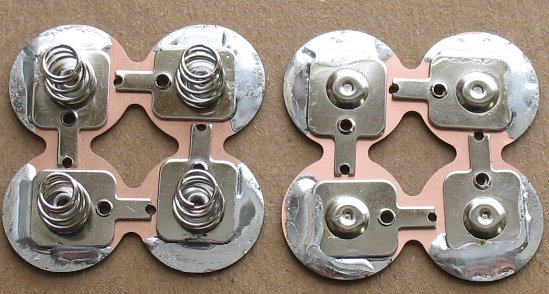
| These are the Battery terminals I am using. | |
| - | |
| Click on the images for a larger image | |
 |
 |
|
Prototype #2 I cut some copper clad boards that fit down into the ends. The four battery chambers are joined together so the circuit board can drop down inside. The battery terminals get soldered to the copper board. The nut that holds it all together is big enough to grab hold and twist with gloves on |
Side View with a couple 18650's loaded. You can see the big nut on the end. |
| - | |
| Click on the images for a larger image | |
 |
 |
|
Prototype #2 A shot with the Battery terminals soldered to the copper boards |
The copper boards snaps down inside the ends. I didn't need any glue, the fit was snug. You could use a dab of glue to hold the boards in place. |
| - | |
| Click on the images for a larger image | |
 |
 |
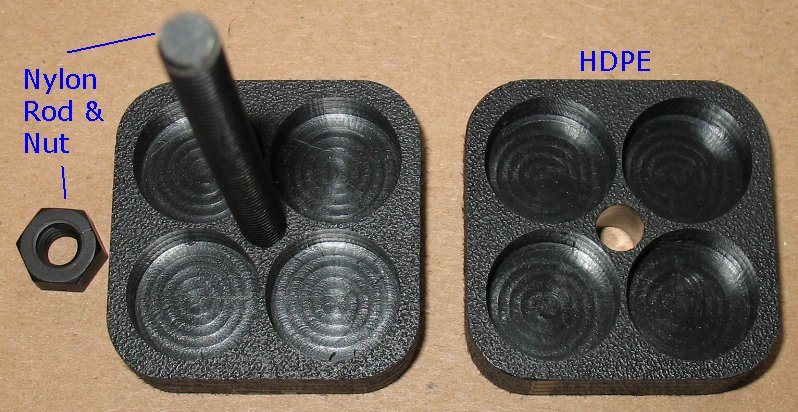
| Prototype #1 - Here's a 4 x 18650 shape I cut on my CNC | Prototype1 - Side View |
| - | |
| Click on the images for a larger image | |
 |
 |
|
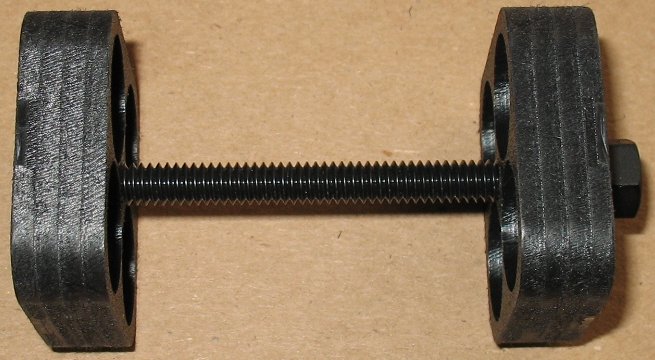
Prototype #1 I tapped 1/4-20 threads into the base. The threaded Nylon rod in the center is screwed into the base. The top piece is drilled smooth so the threaded rod can pass through the top. The nylon nut secures the whole rig together nice and tight. The battery holder, rod and nut weights 28 grams. :) |
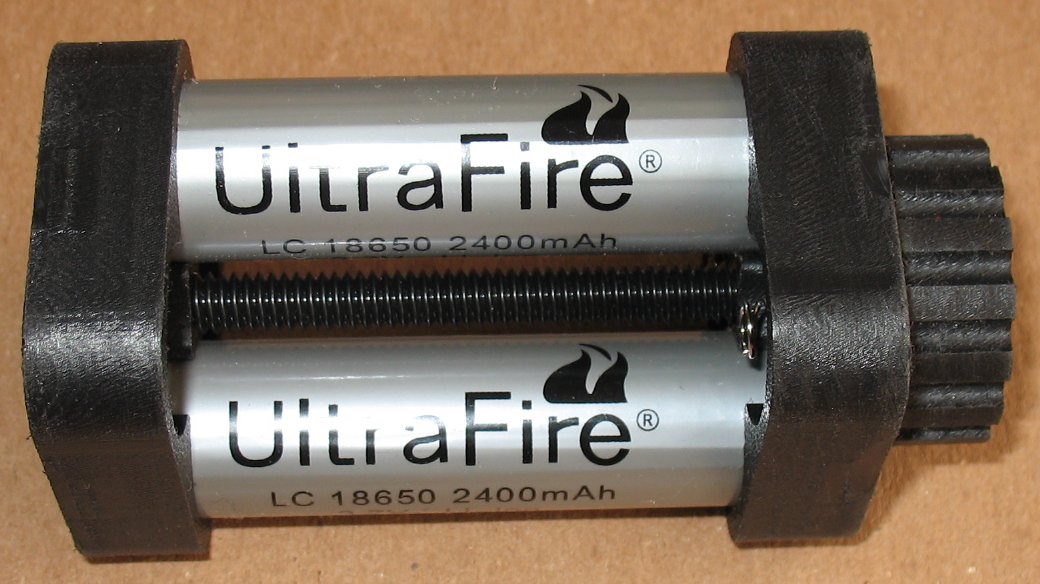
Prototype #1 Here's a shot with some 18650's loaded into the holder. |
| - | |
Enter My Tube Amp Parts Store Here
Mobile users Enter My Tube Amp Parts Store Here
The Tube amp Library of information
Click the link above for Tube amp info, Schematics, Board building information, Projects, Mods, Transformer diagrams, Photo's, Sound clips.
There are hundreds of pages of Tube amp information on my library page.
Please visit my Tube Amplifier Forum
Here's the place you can go to ask tube amplifier questions.
You will find a large community of friendly amp builders at the link above.
Check the huge library of Schematics here
Design your own custom Turret Board or Eyelet board
DIY Layout Creator file analyzer program
DIY Layout Creator file library
Sound clips and tunes of all types
How to email me
|
MEMBER OF PROJECT HONEY POT Spam Harvester Protection Network provided by Unspam |