
Recording/Overdubbing Guitar Rig using Mixcraft 5Back to the main Sound page |
| - |
| Recording Guitar rig as wave output |
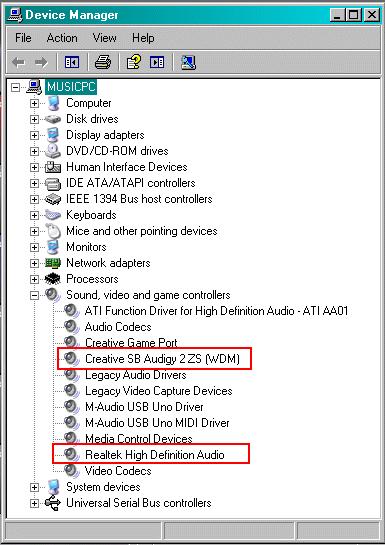 |
| Windows device manager showing the two sound cards I will be using I also use a M-Audio Fast track ultra external sound card, not shown on this screen shot In order to be able to record the wav output from Guitar Rig and playback the mix without headphones and overdub in Mixcraft, I
use two sound cards installed my computer. If you try to overdub a recording in Mixcraft without using headphones and use the same sound card, you will be recording your
playback mix and Guitar Rig at the same time on your overdub tracks. I am also using the motherboard Realtek soundcard for mix playback. Both sound cards have their own amps and a set of speakers so I can hear the output of both cards at the same time on separate speakers. Both soundcards will have their own setups for playback and record in the windows mixer. |
| - |
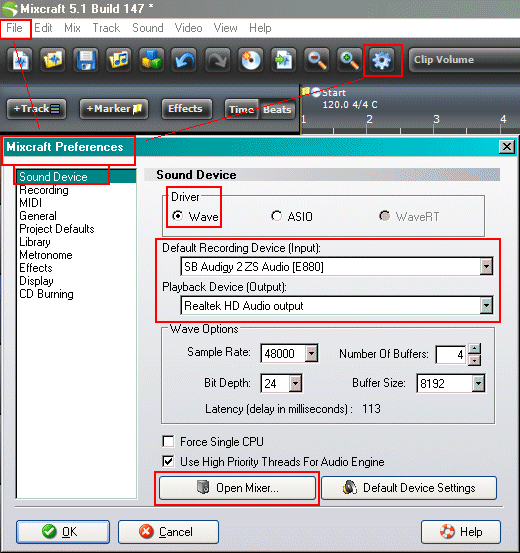 |
| To set up the input and output in Mixcraft, go into preferences You can get there by going into the file menu or use the icon up on the toolbar In the preferences screen, click on Sound device Choose your driver. Here I have chosen Wave Choose the device you want to record from. I have Guitar rig set up to use the SB Audigy card and so I am choosing that as my recording device Choose your playback device I am playing back the mix on the Realtek motherboard sound card I do this so that I do not have to wear headphones when I record Set the Wave options however you like to get a latency that works for your machine. If you get pops, crackles or stutters, you may have to adjust these setting differently Another handy Mixcraft feature: You can access the Windows mixer by clicking on the Open Mixer button |
| - |
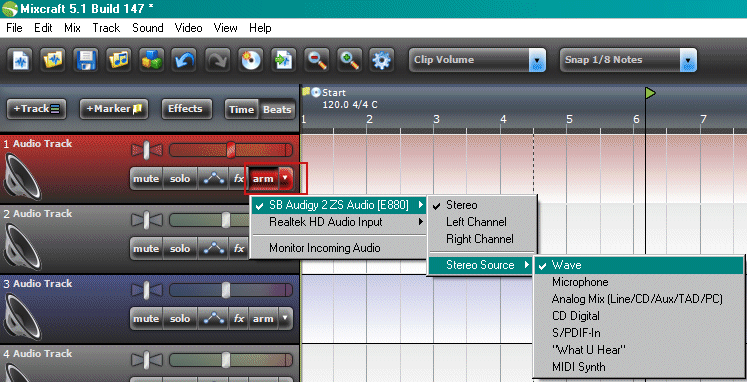 |
| To record the wav output of Guitar rig, arm a audio track in Mixcraft by clicking the arm button Click on the arrow next to arm to choose your recording source Here I have chosen SB Audigy, then Stereo, then wave as my recording source I could also choose "What you hear" or any of the other sources |
| - |
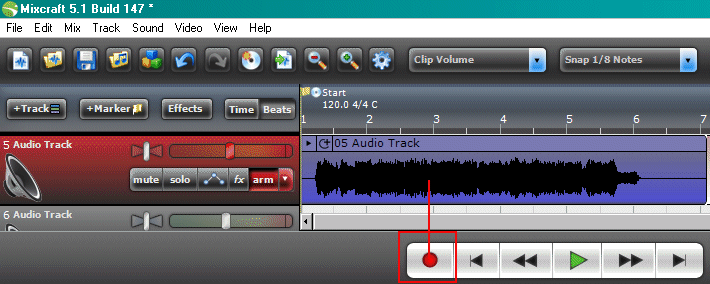 |
| When you are ready to record, hit the red record button and start playing Hit the record button again to stop recording What you recorded shows up to the right on the track Rewind and hit the playback button to listen to what you recorded You can move this sound clip down or up to another track and then record an overdub on the same armed track Click on the recorded track so it is highlighted, then use the up or down arrow to move the recorded sound clip up or down to another track This way, you do not have to keep arming new tracks and making settings This method of recording is old school. It's exactly like if you recorded in a real studio with an amp or in a live situation |
| - |
| Recording your Guitar signal dry and using Guitar rig as a VST effect |
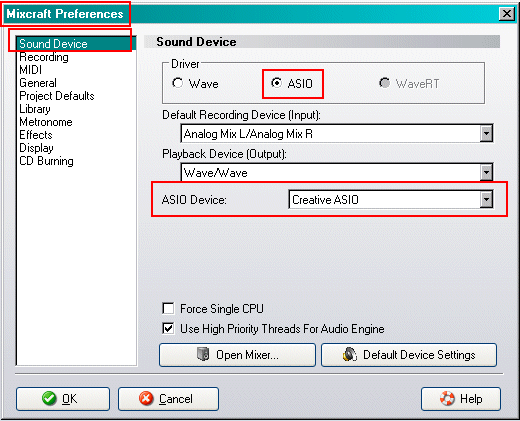 |
| This section describes how to record Guitar rig dry and use it as a VST effect in Mixcraft5 Go into Mixcraft preferences You can get to there by going into the file menu or use the icon up on the toolbar In the preferences screen, click on Sound device Choose your driver. Here I have chosen ASIO Choose your ASIO Device - I chose Creative ASIO |
| - |
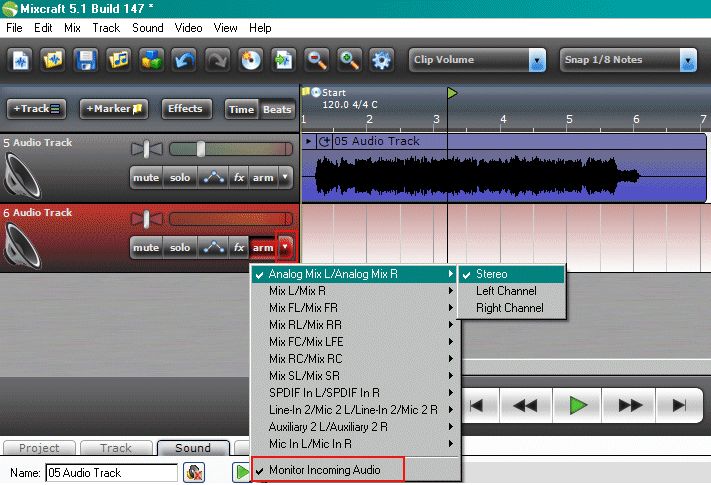 |
| Arm the audio track in Mixcraft by clicking the arm button Click on the arrow next to arm to choose your recording source Click on the Monitor incoming audio to be able to hear the Guitar rig effect while you play |
| - |
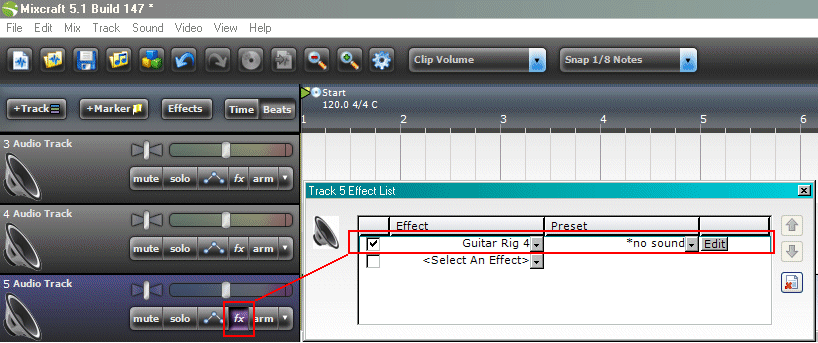 |
| The arm button is supposed to be red in this screen shot, I shut it off by accident. Hit the FX button and add Guitar Rig 4 as an effect for the track Then hit the edit button to be able to choose which Guitar rig preset you want to use on this track |
| - |
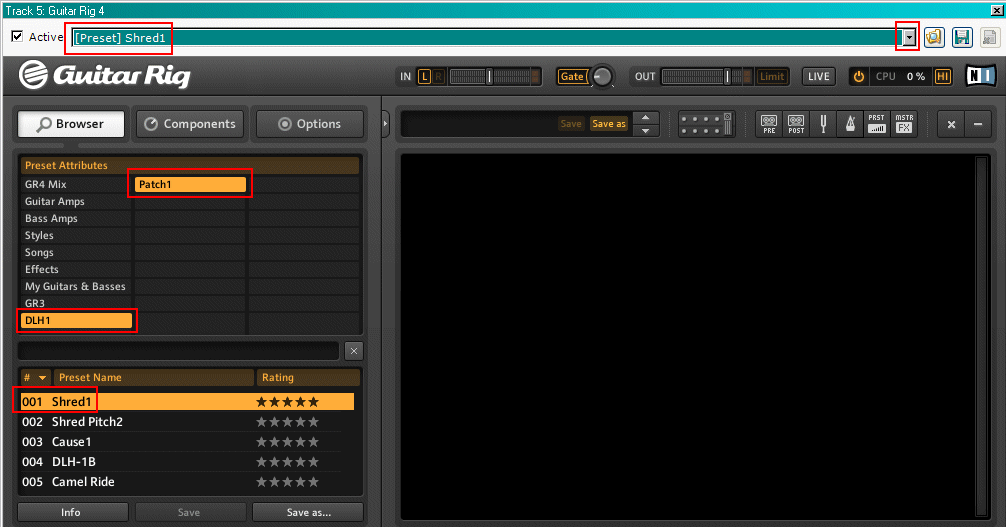 |
| After you hit the edit button, the Guitar rig VST screen will open Choose the preset you want using the Guitar Rig browser on the left side of the screen Here you can see I chose the DLH1 bank Then hit the down arrow showing at the top of the screen shot above You can then choose the all the presets that are in the DLH1 bank by using the pull down menu |
| - |
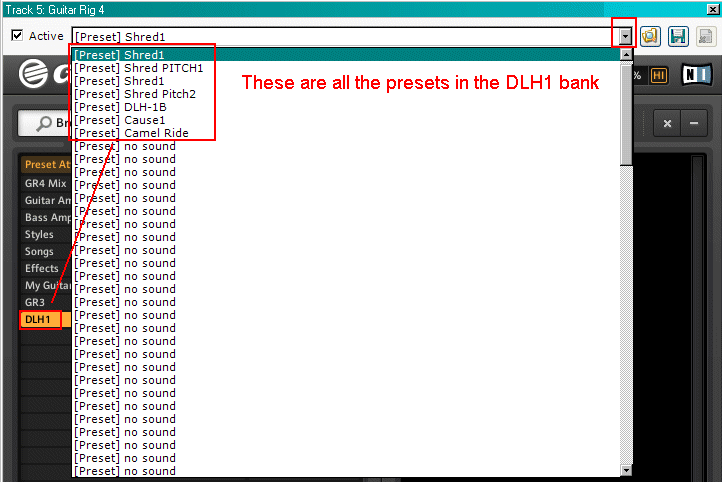 |
| Here's all the presets in the DLH1 bank I am now using the Shred1 preset for my FX sound on track #5 in Mixcraft |
| - |
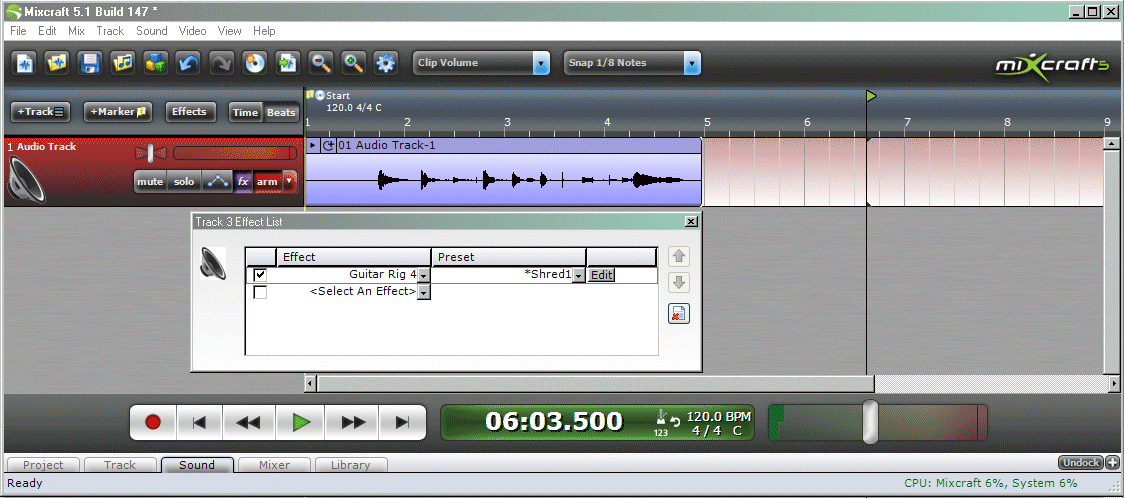 |
| Now Guitar rig4 is the effect for this track and Shred1 is the preset that will be used When you play your guitar, you should hear the Guitar rig effect. |
| - |
|
| When you are ready to record, hit the red record button and start playing Hit the record button again to stop recording What you recorded shows up to the right on the track Rewind and hit the playback button to listen to what you recorded You can move this track down or up to another track and then record an overdub on the same armed track Click on the recorded track so it is highlighted, then use the up or down arrow to move the recorded track up or down Note that you are recording your guitar completely dry The levels will be much lower than when you record the wave output of Guitar rig You may have to go into the windows mixer to adjust the guitar signal level higher when you are recording a dry guitar signal The guitar signal is dry, but the Guitar rig effect is being applied to it. This method of recording has the advantage of being able to change the Guitar rig preset or dial in your sound But, you cannot have too many guitar tracks doing it this way or you will overload your computer. I sometimes have 10+ guitar tracks and so I don't use this method very often. |
| - |