
| Back to Library page |
My Guitar fret level tool used for fret leveling and fret re-crowning |
| - |
| Click on the image to see a larger image |
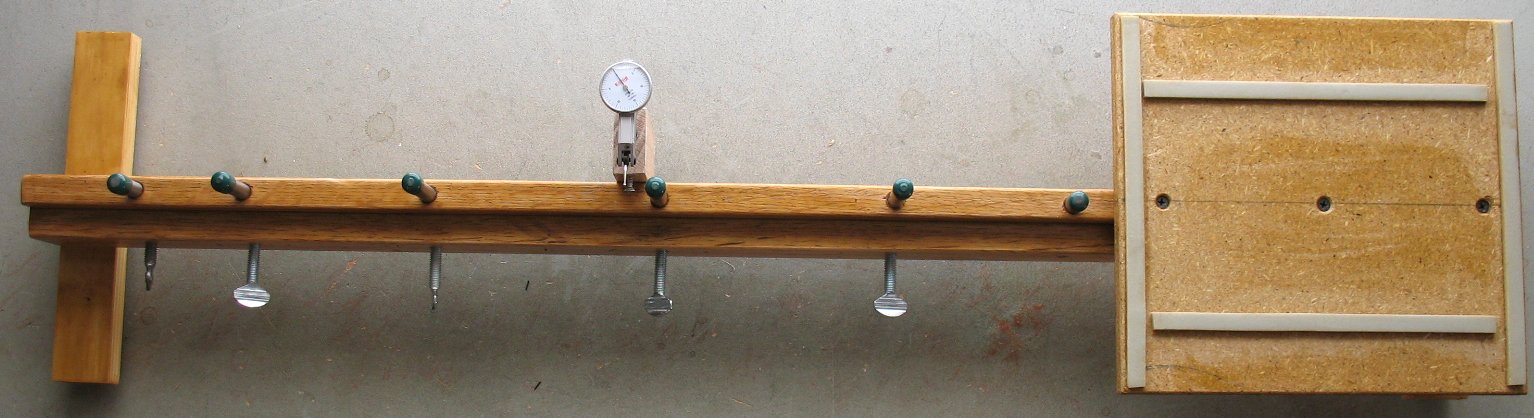 |
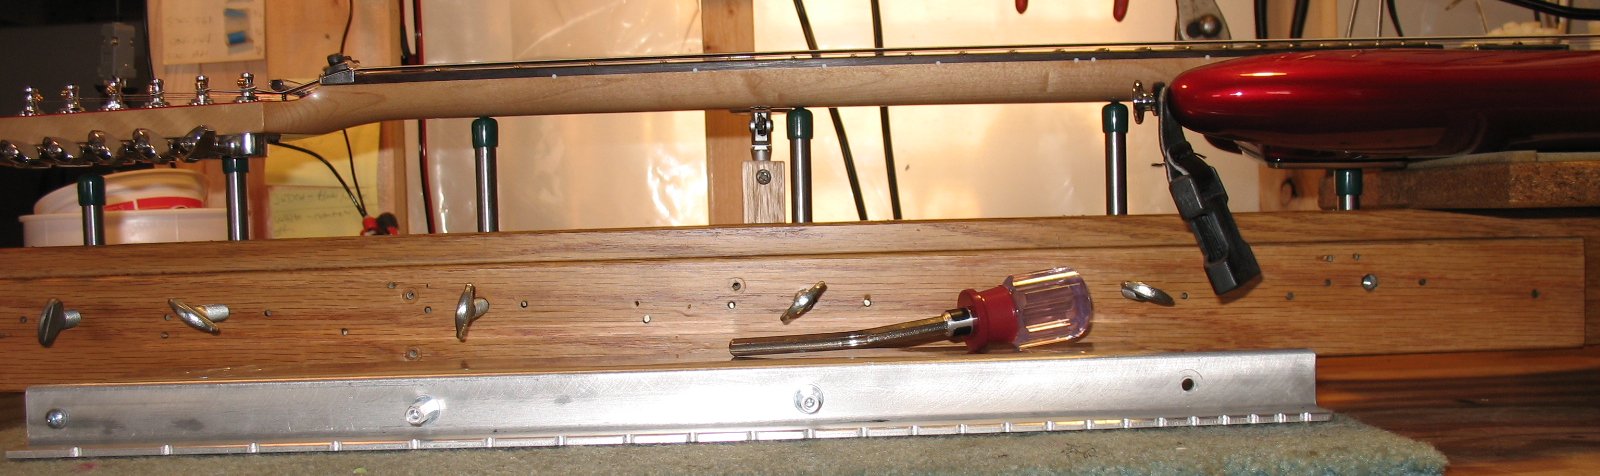
| The fret level tool I got the idea for building this tool after seeing the Stew Mac Erlewine neck Jig. The Stew Mac tool was $370 at the time and it looked like I could build one for a lot less. Mine is a bit different from the Stew-Mac tool. The guitar body area is smaller and the body sits right on the surface of the big square wood piece. I am hanging the rear neck plates off the edge of this wood area because my Ibanez has an angled metal neck plate. The last steel rod on the right supports the steel neck plate when everything is set up. Not shown in the picture above are the straps that are used to lock the guitar down to the tool There are rubber feet under the tool to keep it from sliding around on the work bench. Under the guitar body is some self stick, soft rubber, weather strip material to keep the body from sliding around. The picture above shows the tool with a nice coating of polyurethane. I did a couple guitars first to see if I wanted to change anything before I applied the poly coating. Some of the pictures down below show the tool without polyurethane, as I was doing my Ibanez JS1200CA |
| - |
| Click on the image to see a larger image |
 |
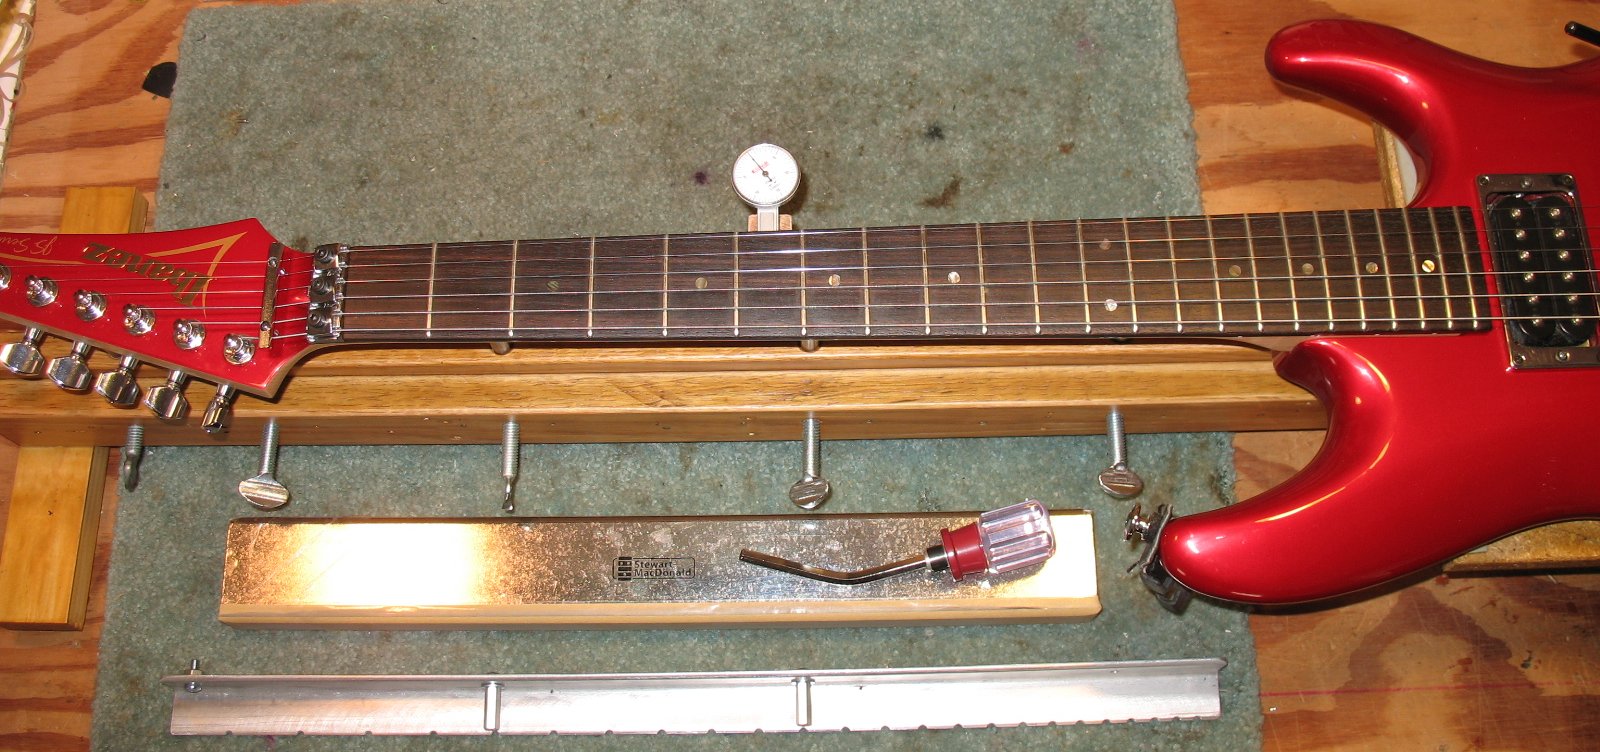
| I have done a couple guitars with this tool so far and it has worked out great. Got a couple more Guitars to do. I am going to do my el-cheapo Ibanez Bass guitar also. The Ibanez shown above had some very flat areas all over the neck from doing bends. It started to fret out badly around the 10th through 13th fret on the small E string. All I can say after doing the fret level and profile is WOW!! There is huge difference in how this guitar plays now. I doubt that frets are even level when the guitar rolled off the assembly line. |
| - |
| Click on the image to see a larger image |
 |
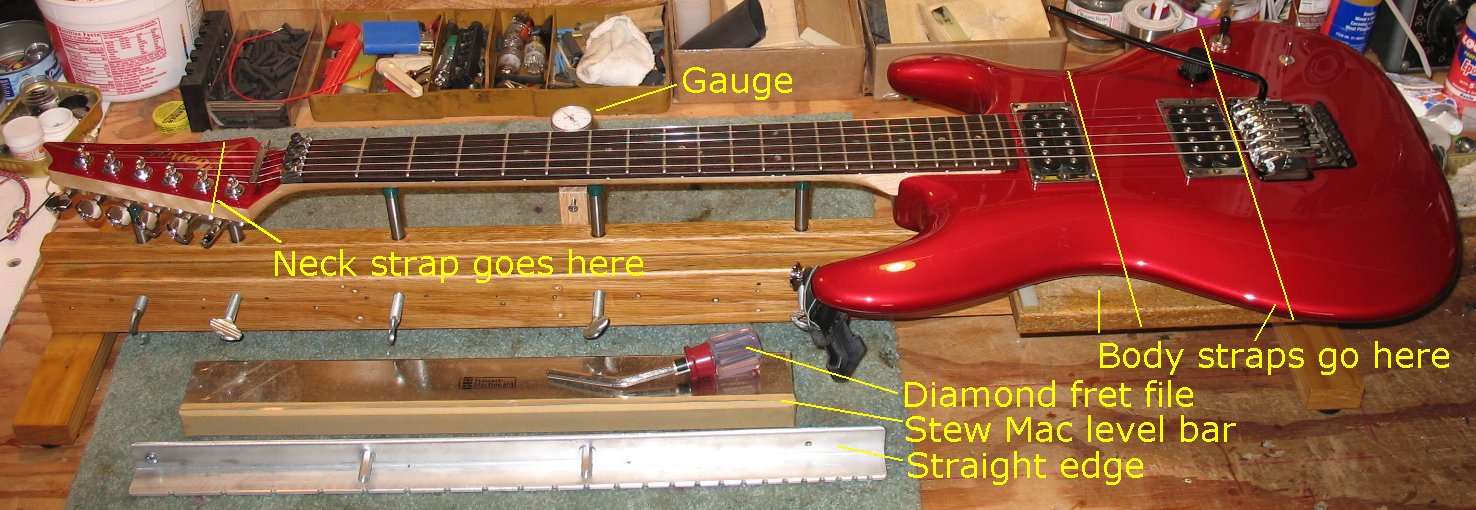
| The other tools I used to level my frets. I also used a Stew Mac fret/fingerboard level tool with 320 grit 3m stik-it paper Link to Stew-Mac fret level tool Link to Stik-it abrasive The small tool with the handle is a diamond fret file that has 300 and 150 grit diamond dust Link to Stew-Mac fret file The long item at the front is a 24 inch Notched straight edge I made on my CNC machine. You lay the straight edge on the fret board to get the neck as straight as possible before starting the fret leveling. The notches fit over the frets so the straight edge touches the finger board. The picture makes the notched straight edge look curved, but it is flat. |
| - |
| Click on the image to see a larger image |
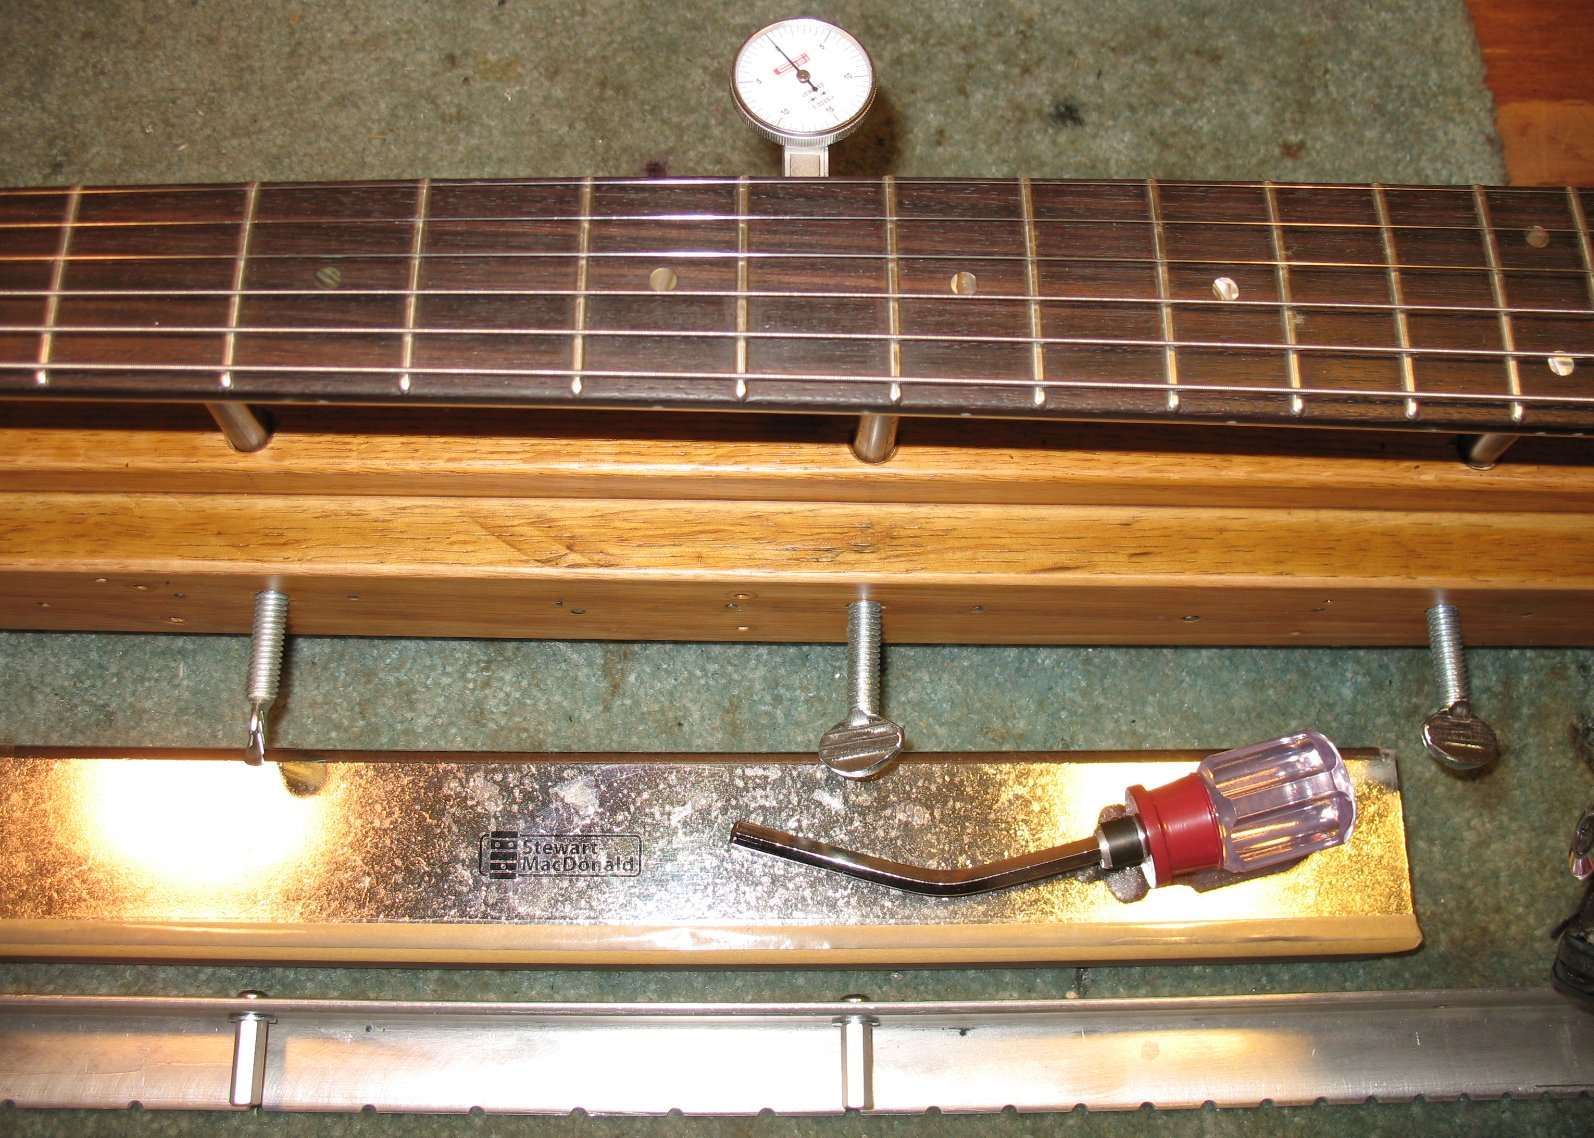 |
| I added a dial indicator to see how much flex was happening as I was using the fret level tool. I already owned the dial indicator which I used to set up my CNC machine. The neck flexed down about .0015 as I was using the heavy fret level tool You don't really have to press down on the fret level tool, it is very heavy steel and precision ground flat. You just move it back and forth across the top of the frets. |
| Click on the image to see a larger image |
 |
| There are 6 x 3/8" steel bars that are raised up after the neck is perfectly level. These bars have plastic tips to keep from scratching the neck. The bars keep the neck from flexing while you are doing the fret leveling. The first bar on the left would only be used for a long Bass guitar neck. You raise up the bars and then lock them in place by turning the 5/16" threaded lock screws Not shown in the pictures above are the straps that lock the body and peg head down to the tool. |
| - |
| The pictures below are before I applied a nice polyurethane coat to the neck jig tool |
| Click on the image to see a larger image |
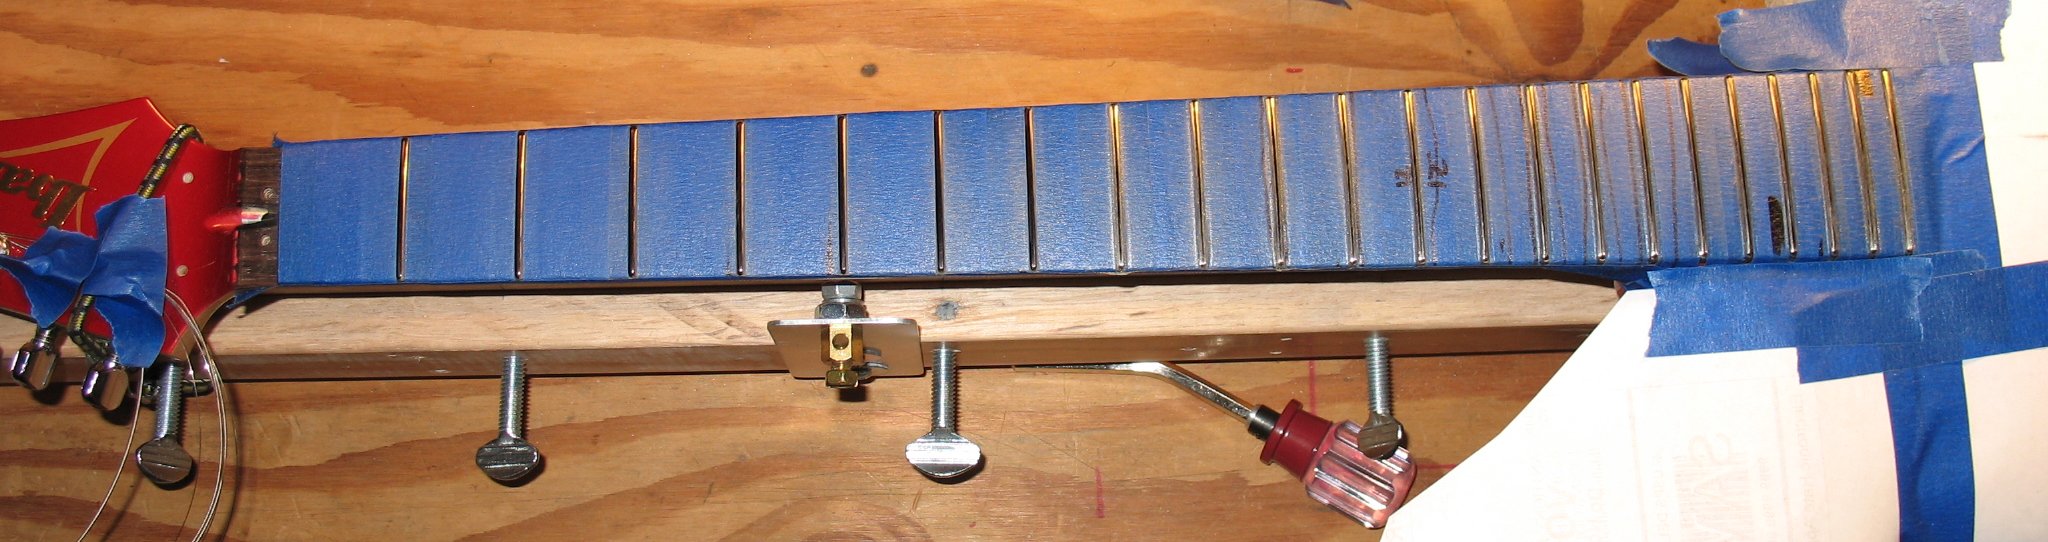 |
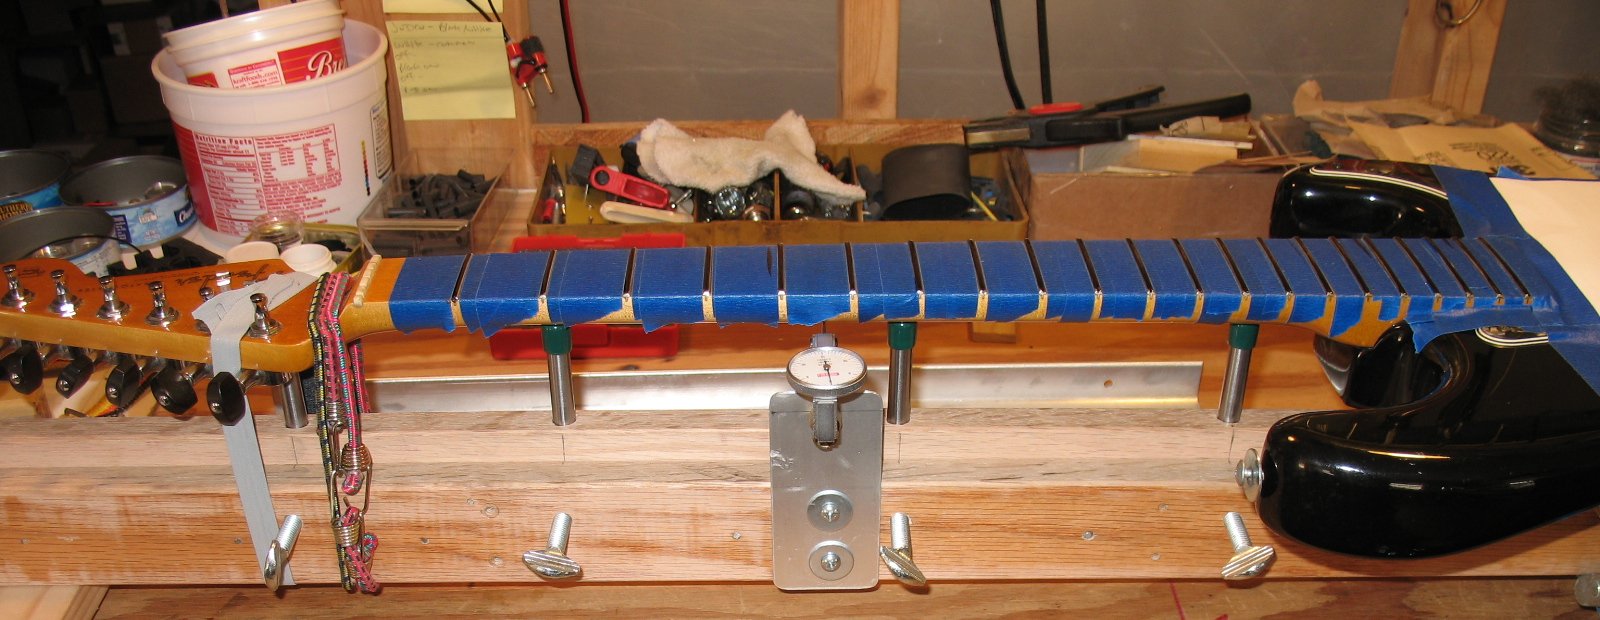
| Here you can see I have the Ibanez neck all taped up I drew on top of the frets with black magic marker so you can tell where you have sanded. As you level the frets, you can see which frets still have black marker on them and which ones are being leveled down faster. Once all the frets have the black marker sanded off, they should all be level. |
| - |
| Click on the image to see a larger image |
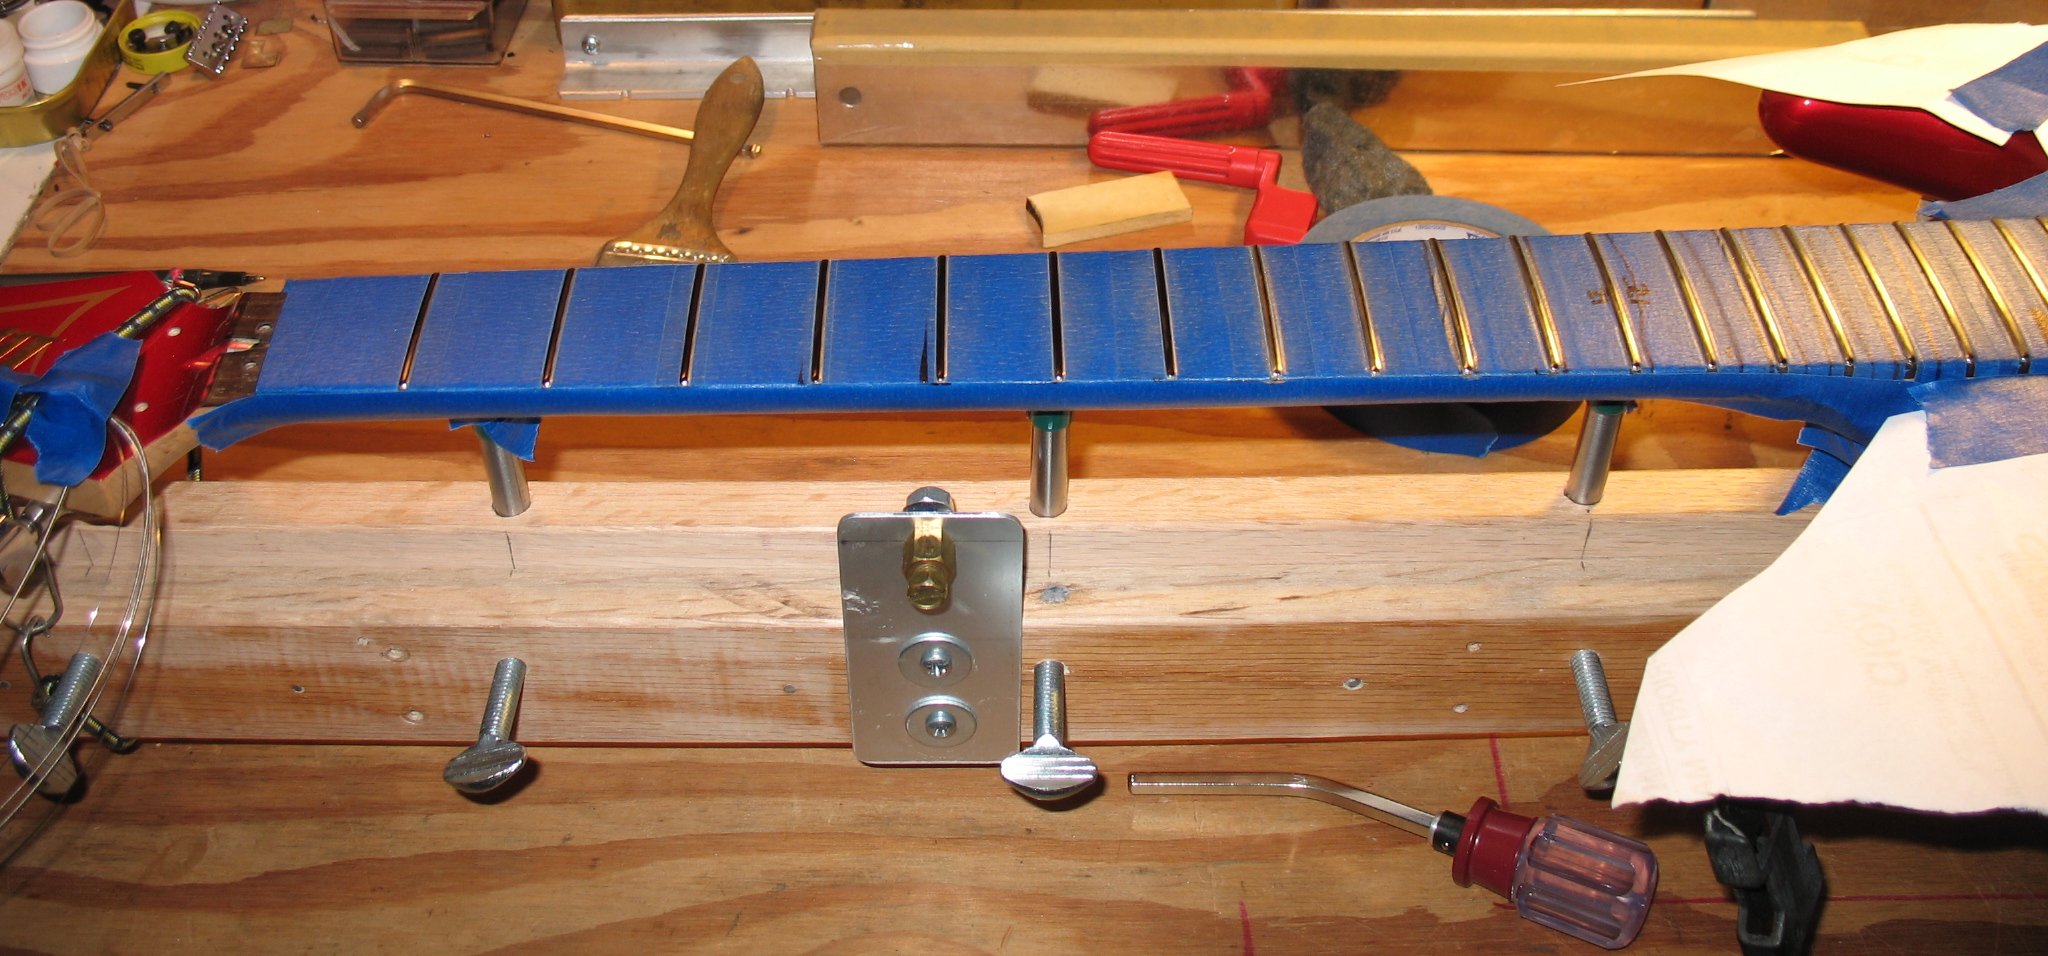 |
| Nut removed, Body and neck taped up The metal object under fret #5 is my first attempt at mounting the dial indicator. I found that it was in the way and so I moved it to the other side of the neck. I also made a different, more solid mount for the dial indicator. |
| - |
| Click on the image to see a larger image |
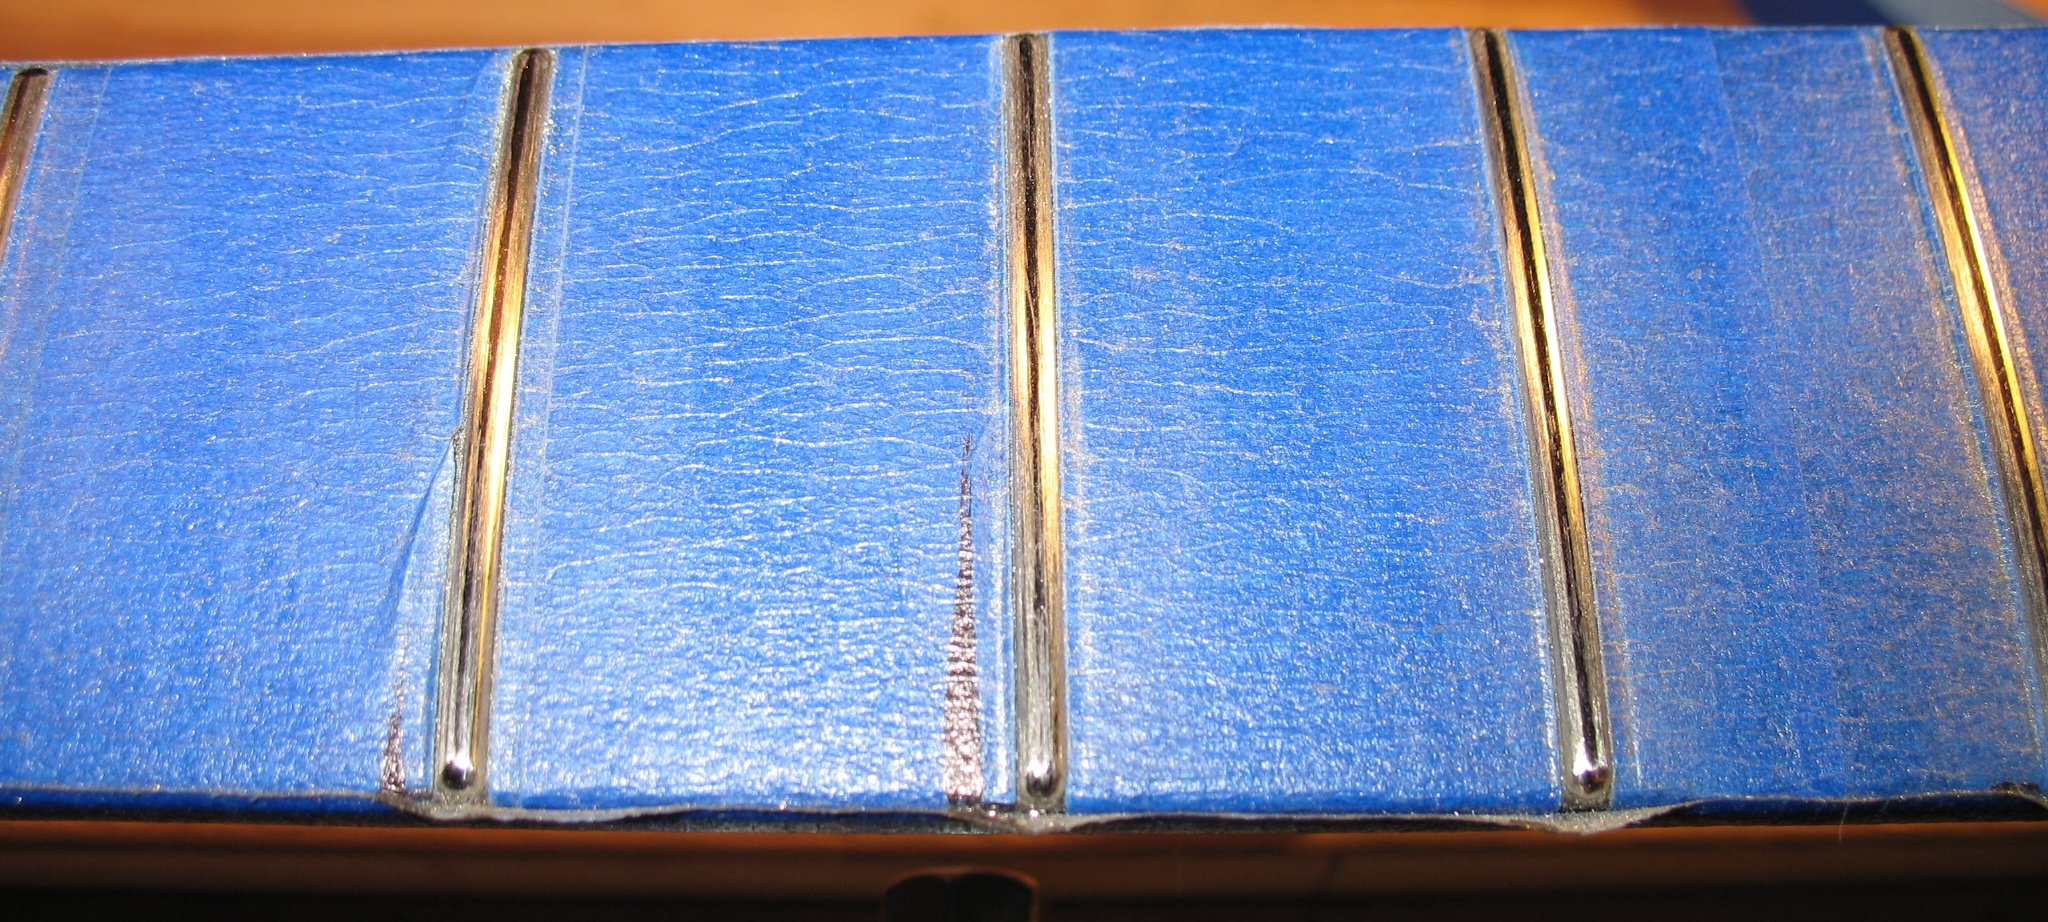 |
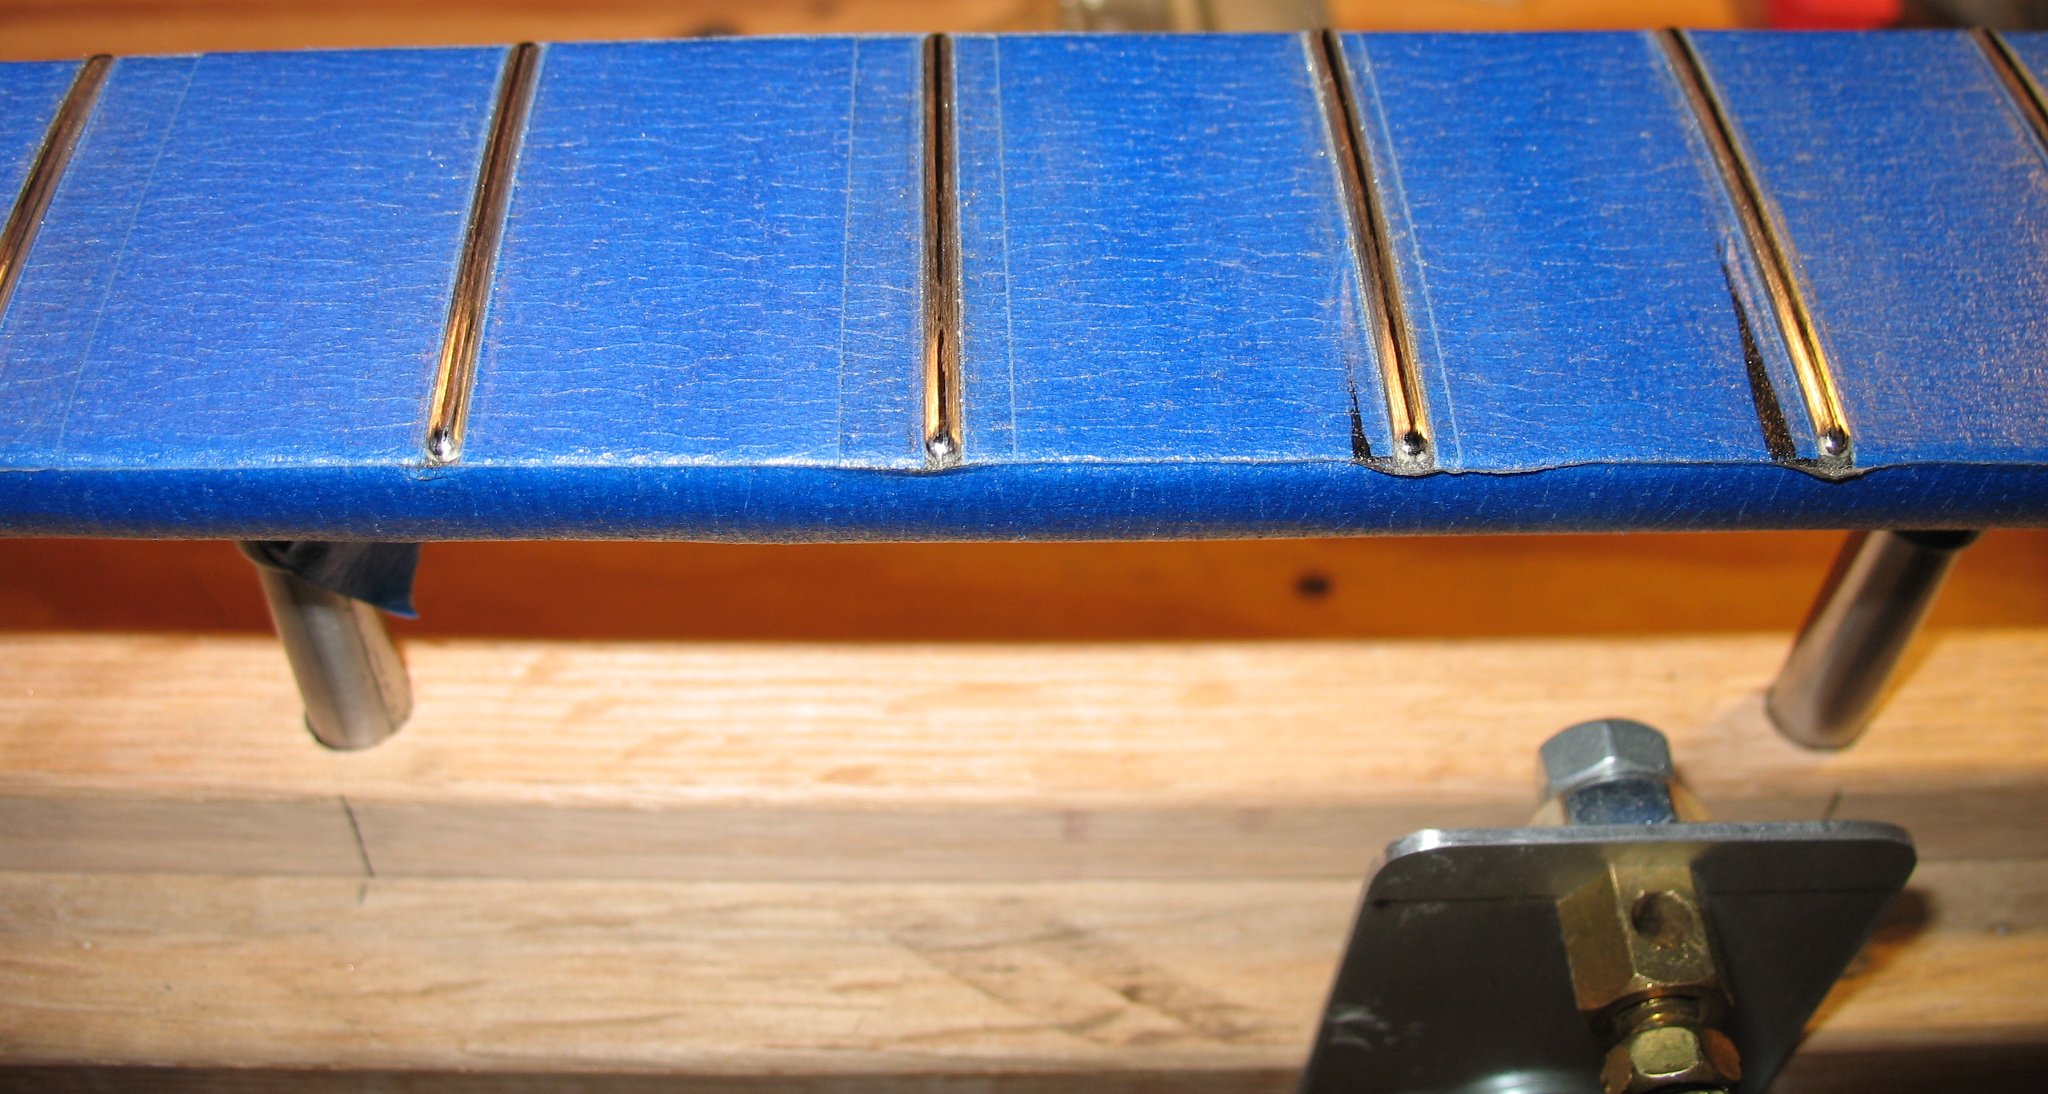
| After I leveled all the frets, I used the diamond fret file to profile the frets. I used the magic marker again to make the frets black I removed fret material from the side/top edge until I had a nice thin black line left. The black line is the fret tops that have not been touched by the diamond fret file. The frets tops were wide and flat after the fret level The fret tops are already level, you only want to create a nice fret top profile. This guitar has relatively skinny frets. They measured .095" wide at the fret board surface with my digital gauge. |
| - |
| Click on the image to see a larger image |
 |
| Another shot of the finished fret profile on my Ibanez |
| - |
| Click on the image to see a larger image |
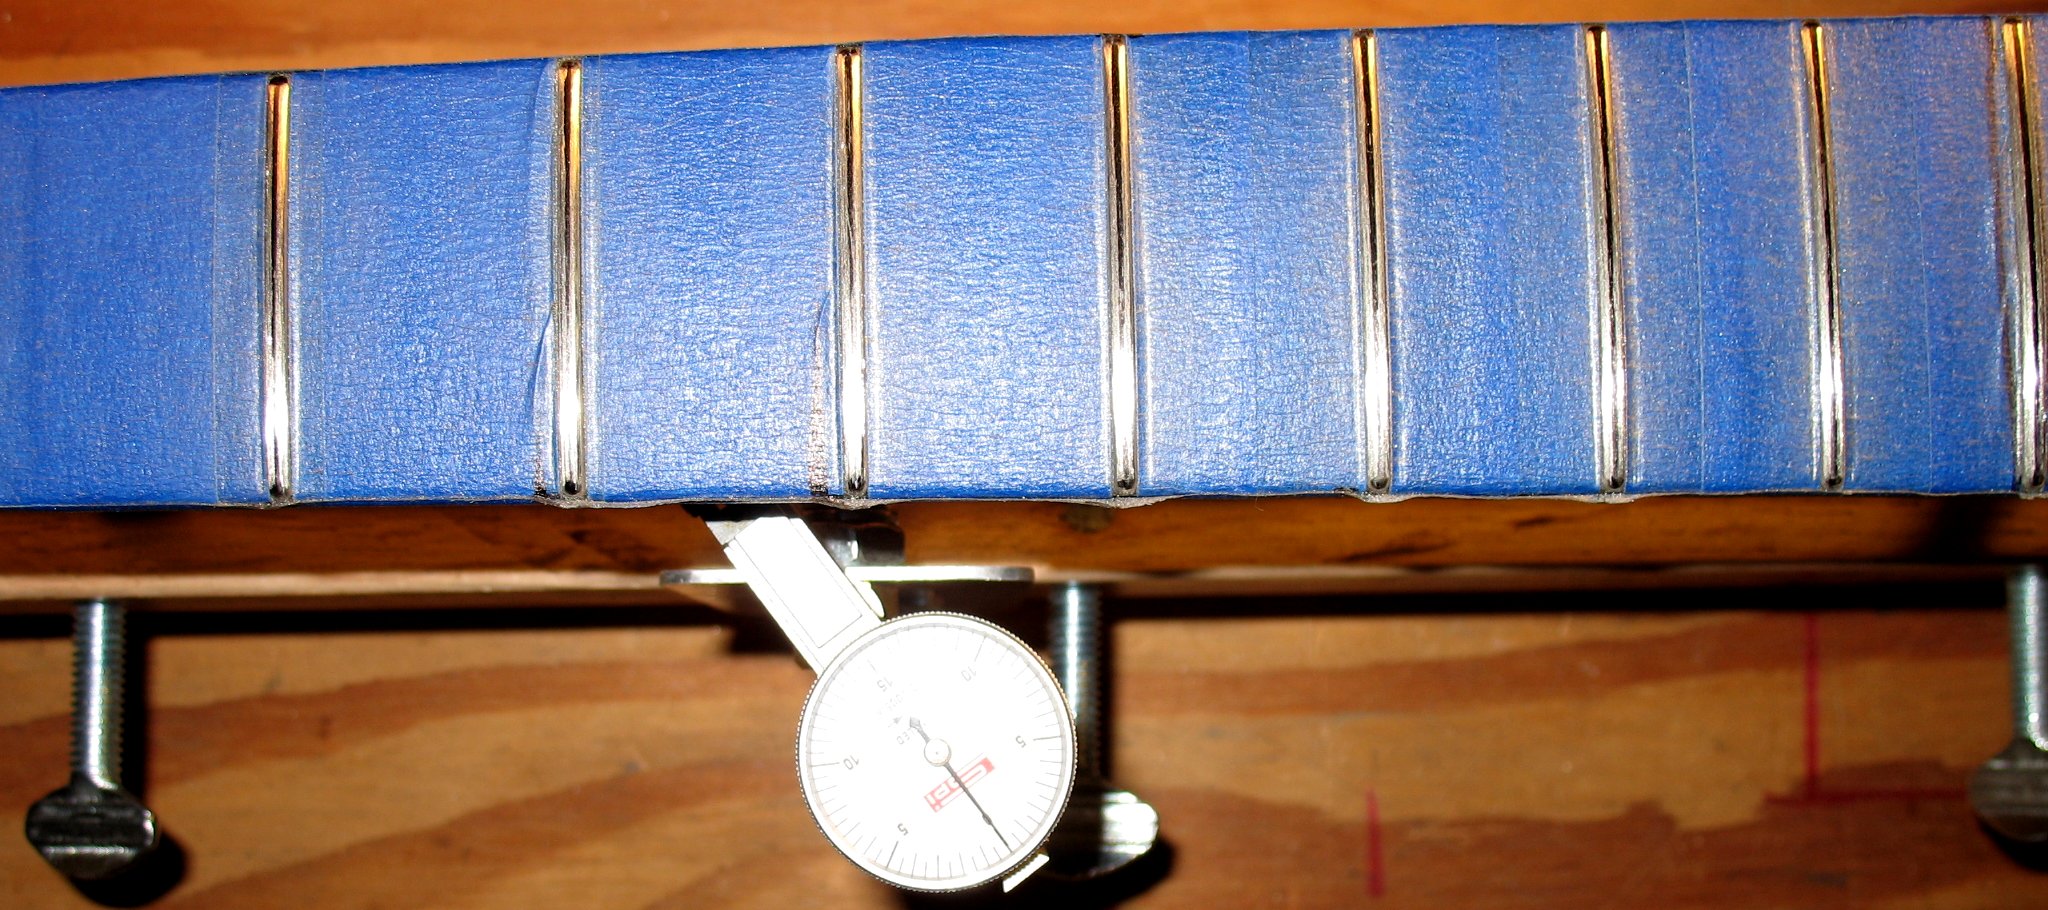 |
| Another shot of the finished fret profile on my Ibanez The big fret level tool had 320 grit abrasive paper. The shot above shows after the 320 grit leveling and then the 150 grit diamond fret file/profile Then I used 600, 800, 1200 and some fine steel wool to polish the frets. The frets came out looking out awesome and they play like butter. |
| - |
| Click on the image to see a larger image |
 |
| I also did my Heavy caster which has a horrible neck. It's better now, but the neck is twisted and warped badly. What it really needs is to pull the frets and do a fret board leveling and then a new fret job This guitar is tuned down to D with some big strings It has a locked down stop tail piece so there is a big solid string to body connection. I only use this guitar for heavy chords on some of my recordings. |
| - |
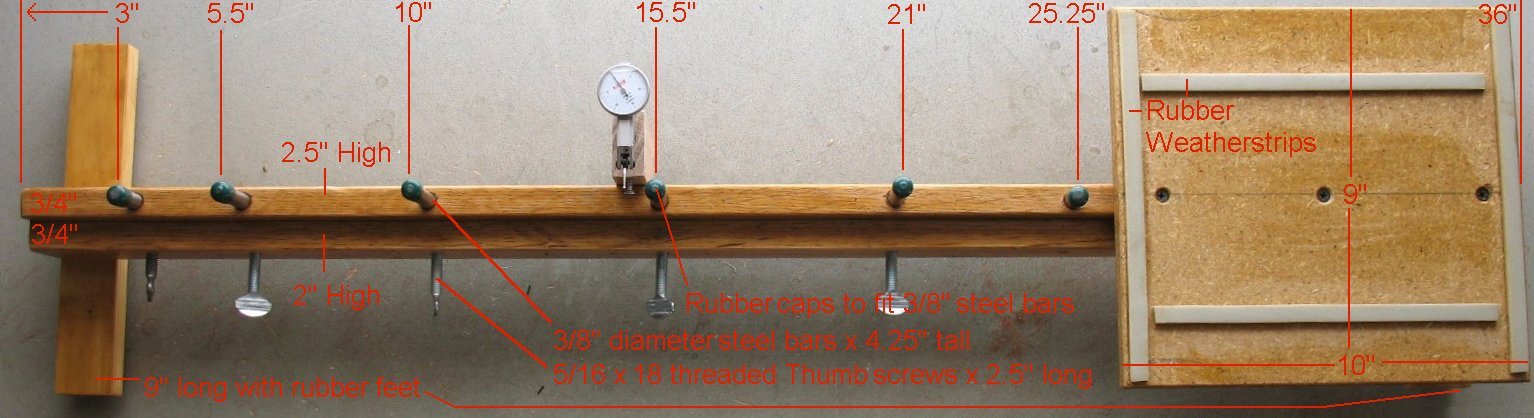 |
| If you are interested in making one of these, click on this image to see measurements. |
| - |
Enter My Tube Amp Parts Store Here
Mobile users Enter My Tube Amp Parts Store Here
The Tube amp Library of information
Click the link above for Tube amp info, Schematics, Board building information, Projects, Mods, Transformer diagrams, Photo's, Sound clips.
There are hundreds of pages of Tube amp information on my library page.
Please visit my Tube Amplifier Forum
Here's the place you can go to ask tube amplifier questions.
You will find a large community of friendly amp builders at the link above.
Check the huge library of Schematics here
Design your own custom Turret Board or Eyelet board
DIY Layout Creator file analyzer program
DIY Layout Creator file library
Sound clips and tunes of all types
How to email me
|
MEMBER OF PROJECT HONEY POT Spam Harvester Protection Network provided by Unspam |